Wellness Wednesday: GAPS Nutola

Posted on

So, it’s been a while since I’ve posted.  I have good reason, I promise.  We put our first house on the market last summer, and let me just tell you that the whole moving process is A BITCH.  There, I said it.  No sugar coating this one.  Moving kicked my ass!  First, there was the decluttering that started well before we even interviewed real estate agents.  We had been toying with the idea of moving back to our hometown (The PTC Bubble), and when we finally made the decision that we were ready, we were committed.  We had been in our house for almost 10 years at this point.  The longest we both had been in any housing since childhood.  You would not believe the amount of STUFF that one accumulates in a 10-year period.  Or, maybe you would.  INSANE!  We started with closets, and proceeded to the basement, attic, garage, and shed.  We started with plastic storage bins for the stuff we wanted to keep for the time being but knew we needed to keep out of sight for staging purposes.  We spent a small fortune on the cheapest plastic bins The Home Depot sells.  That small fortune was not enough.  Every weekend, I tried to tackle a corner of our modest, but very full, starter home.  It took months.  I’m so proud of how our staging efforts turned out, but I was ready to sleep for a week out of sheer exhaustion of tackling such a large organization project.  I’m looking forward to sharing the end product with all of you.

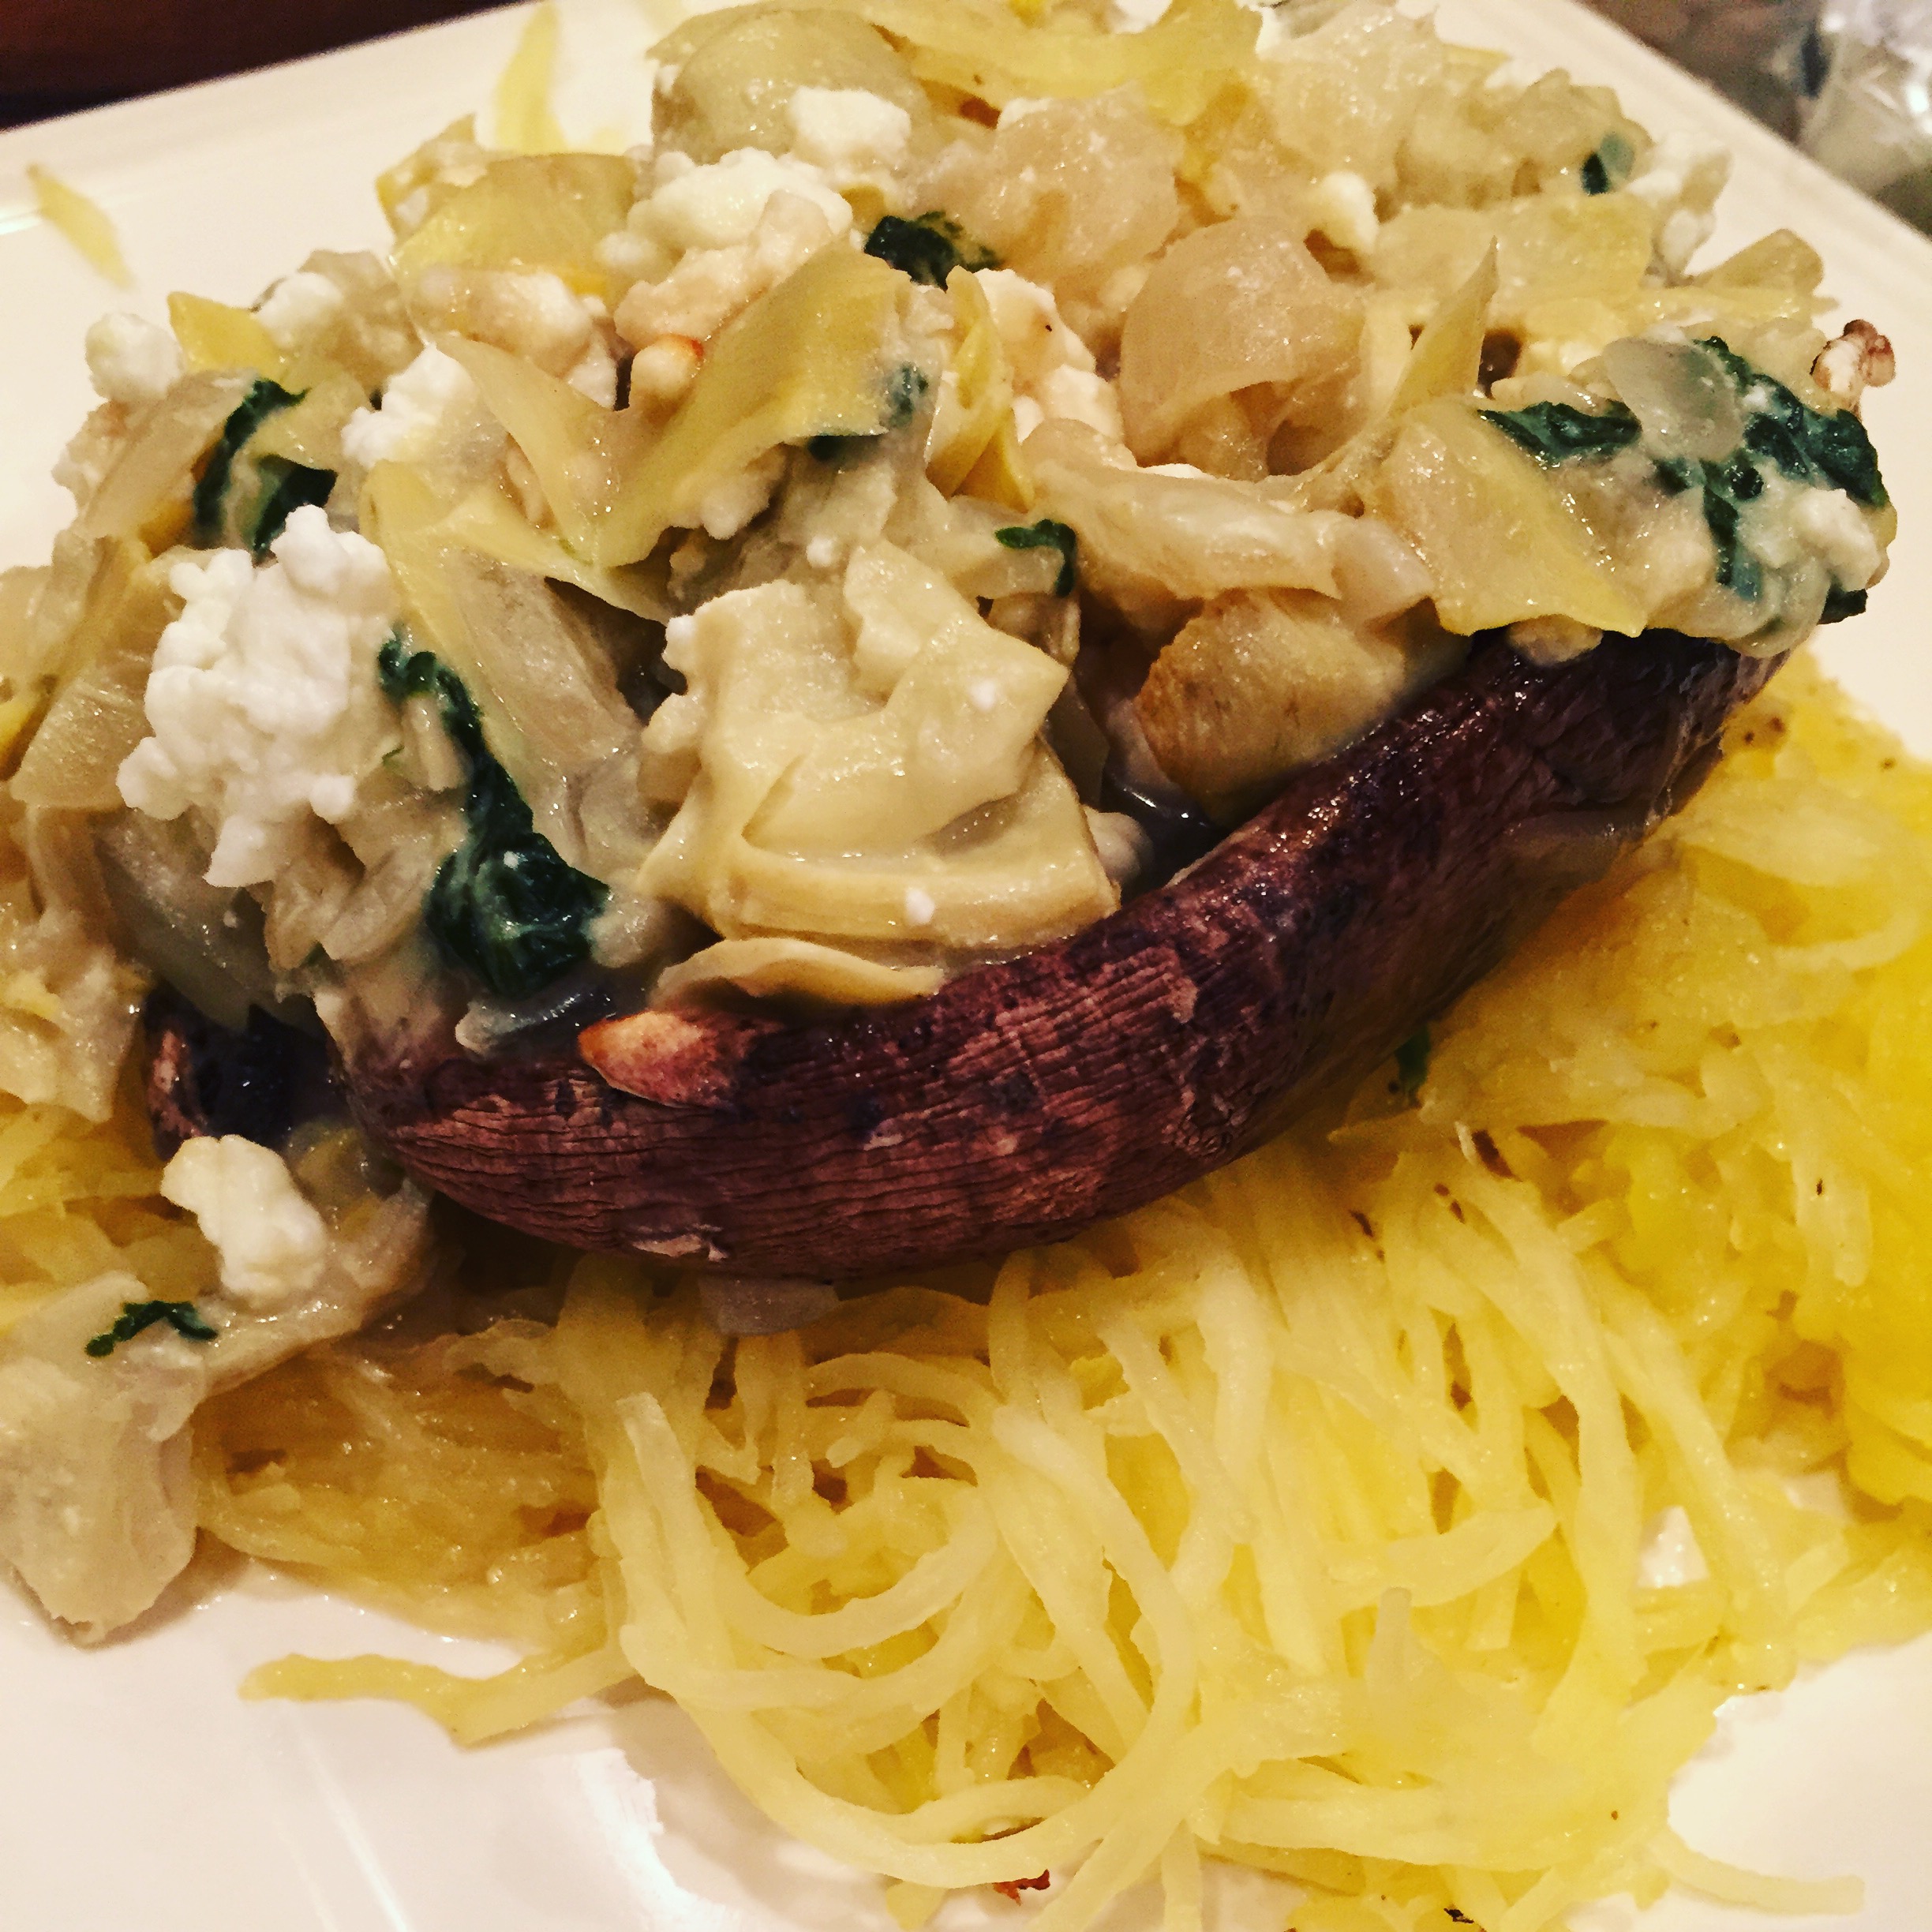
At the same time, I was also experiencing a health crisis of sorts.  This may be an exaggeration, but I’m sure many of you understand the feeling of being fed up and ready for change.  You may remember from my g-free post that I suffer from psoriasis.  This has been an on-going struggle of mine that is sometimes very manageable and at other times causes a lot of stress.  I was at the point where I knew something had to give.  I had been “managing” for years, but I still hadn’t discovered what would keep it at bay for the long-term.  I debated having thousands of dollars of blood work done to determine the best course of action.  But, then I attended a free class on gut-health hosted by the Green Queen herself and led by an intelligent neuroscientist.  Both of these women had discovered the GAPS protocol on their own and had seen it work wonders in their own lives.  I was intrigued.  I dove into research and decided I wanted to give it a try.  While I was purging my house of material things and cataloging 10 years of memories, I prepared for a life-changing adventure in the kitchen.  Hubby was on board (especially since I decided against spending all that money on testing), and we both agreed Munchkin would join us for the ride.  We started the GAPS protocol the same week the “For Sale” sign went in the yard.

Y’all, I am certifiable.

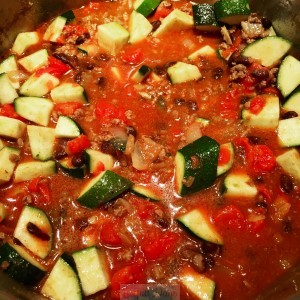
More on the GAPS protocol at a later date, but suffice it to say, it is labor intensive.  Every meal and snack produced a mess in the kitchen; a mess that had to immediately be attacked so that the house was ready for showings.  I am a glutton for punishment.  The first week is a blur of food prep and food cleanup, but for the first time, I was waking up without an alarm clock and not wanting to hit snooze.  The recipe that follows is one of the first GAPS recipes I made, and it is still a favorite!  It may seem time-intensive, but most of it is inactive soaking and dehydrating time.  These steps are important in the GAPS world and help your body digest the phytic acid and enzyme inhibitors found in the nuts.  Wellness Mama and Mommypotamus both have great posts on the benefits of soaking nuts.  I encourage you to give it a try.  Your digestive tract will thank you 😉

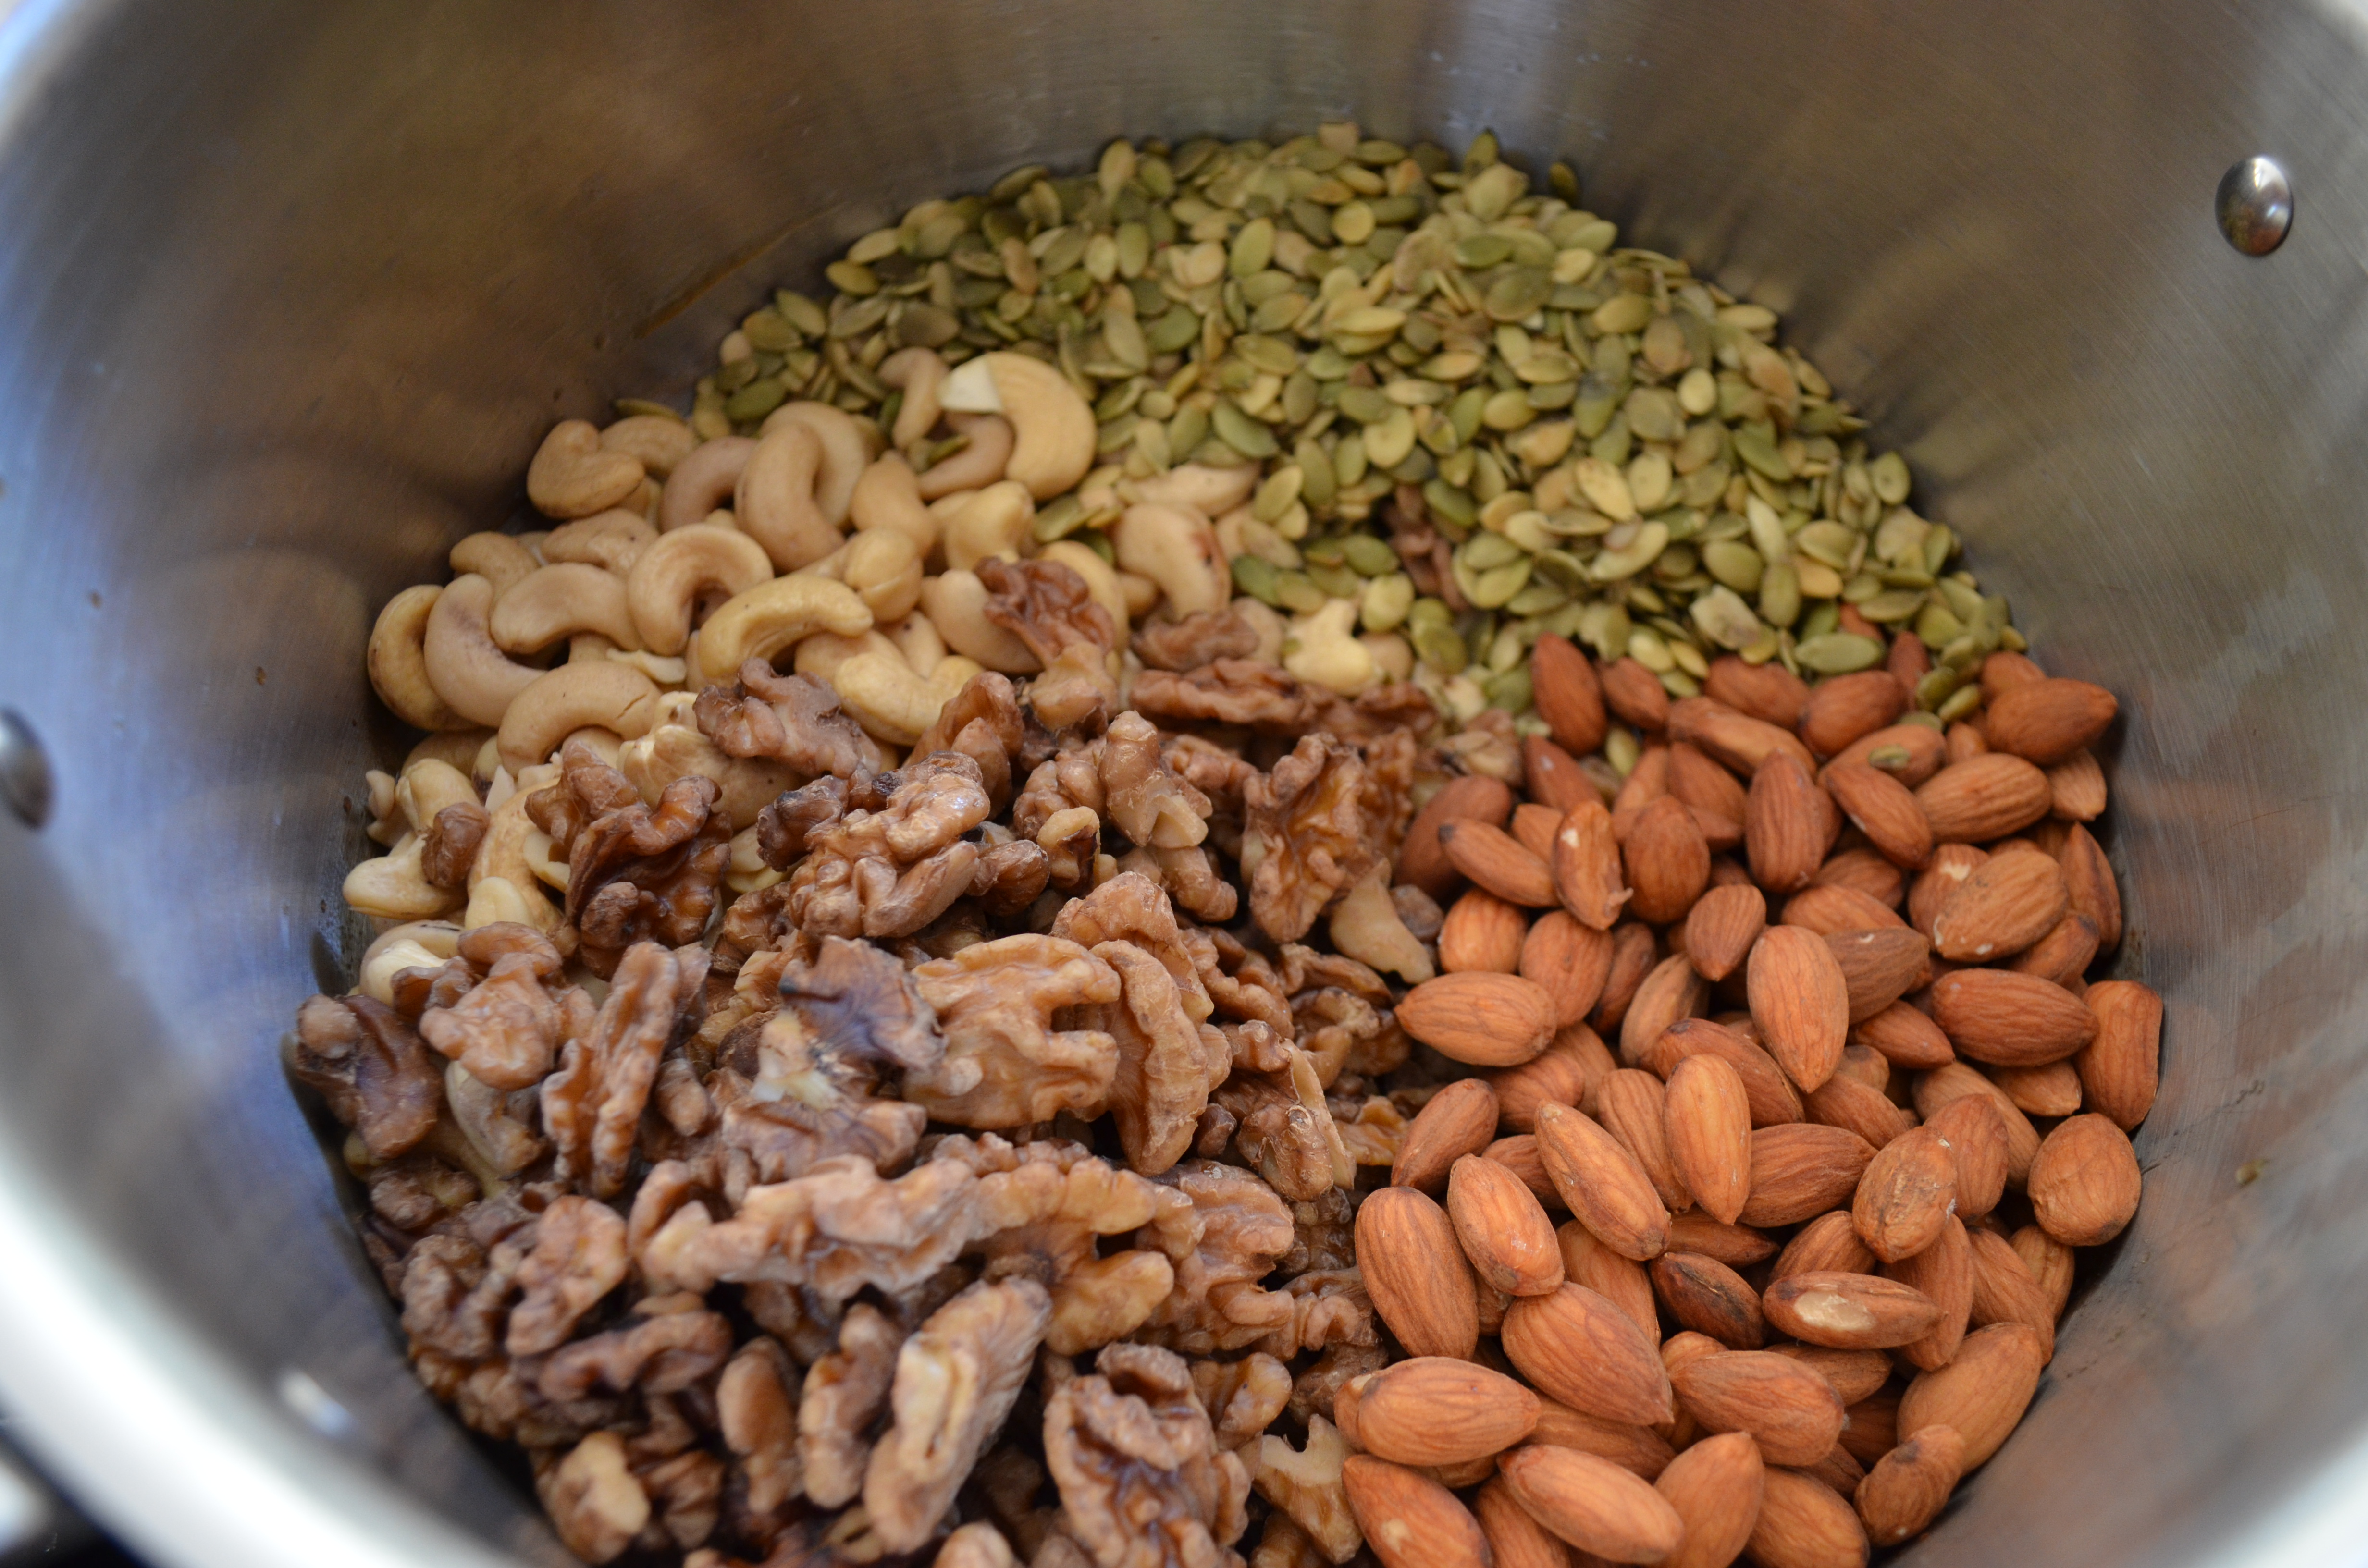
The first step in preparing Crispy Nuts is to start with raw nuts.  This recipe calls for cashews, almonds, walnuts (easily becoming my favorite nut), and pumpkin seeds.  I have been pretty happy with the selection at my local Costco for bulk nuts.  Nuts are expensive!  Trader Joe’s can be another great source.  The package should say “raw” and the ingredients listed should ONLY be the nut.  NO oils, salt, etc.  These are the nuts I used:

Cashews

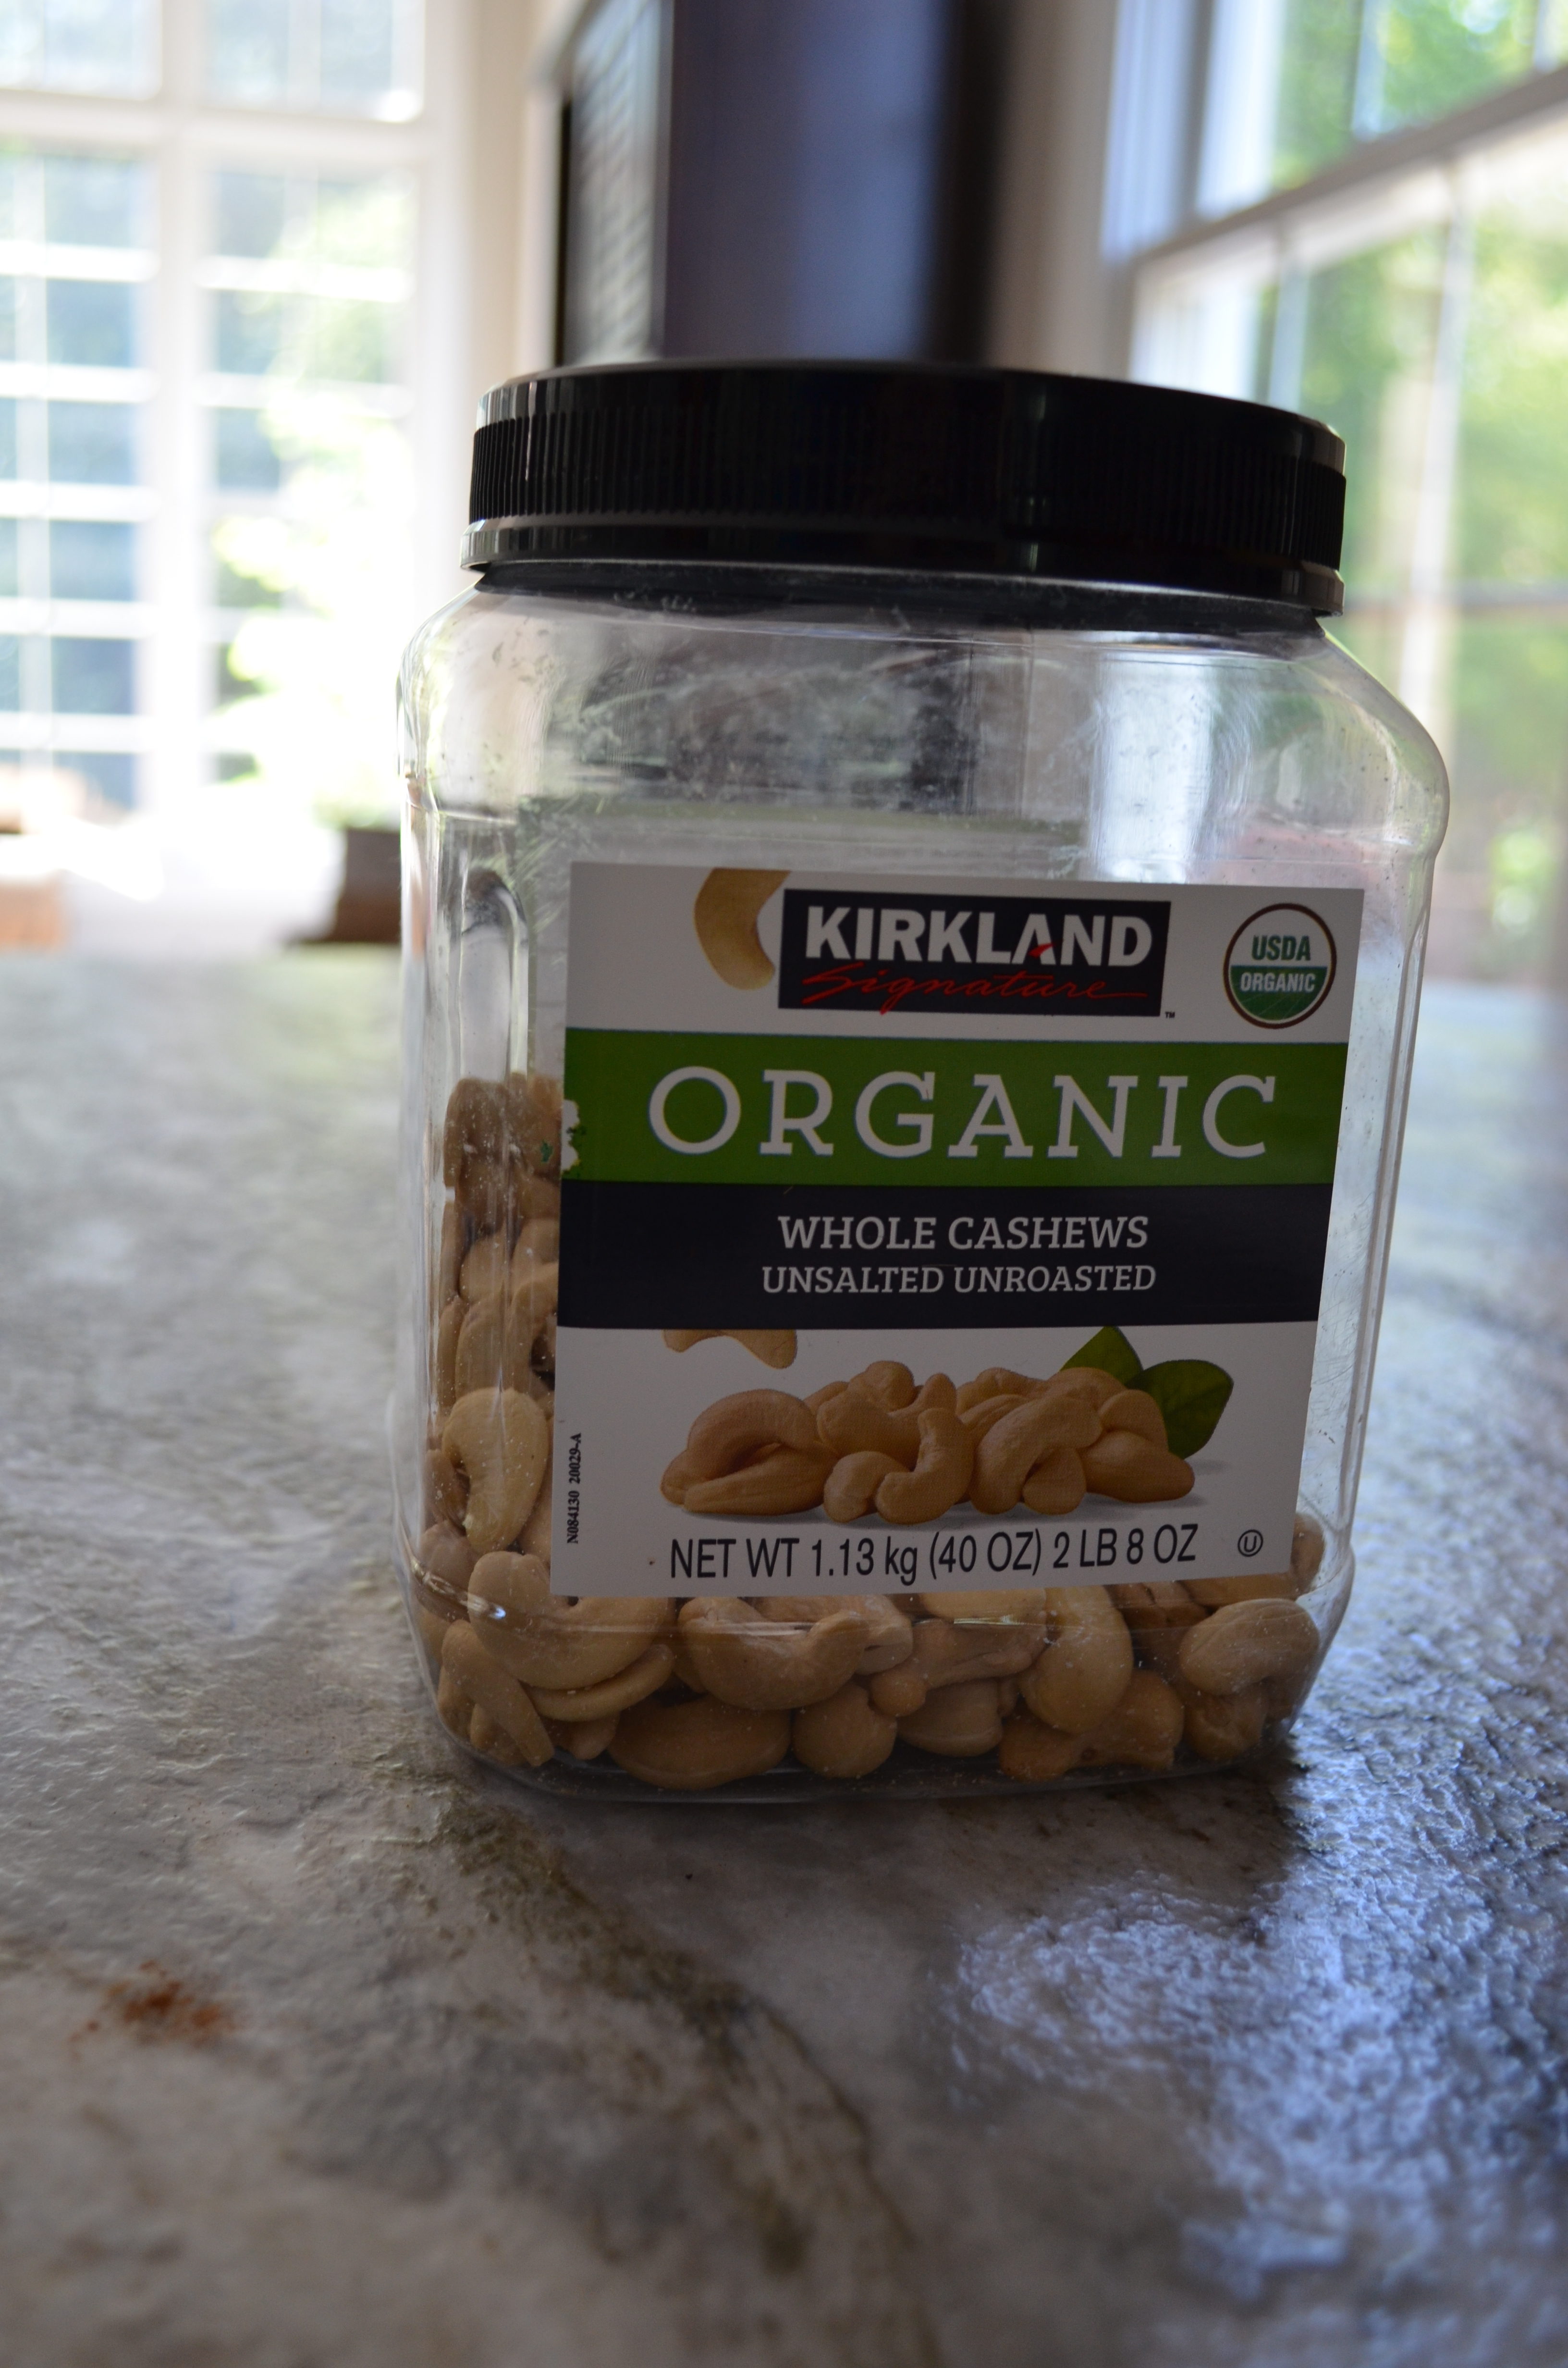
Kirkland Signature Whole Cashews

Almonds

Kirkland Signature Whole Almonds

Walnuts

Kirkland Signature Walnuts

Pumpkin Seeds

Raw Pumpkin Seeds

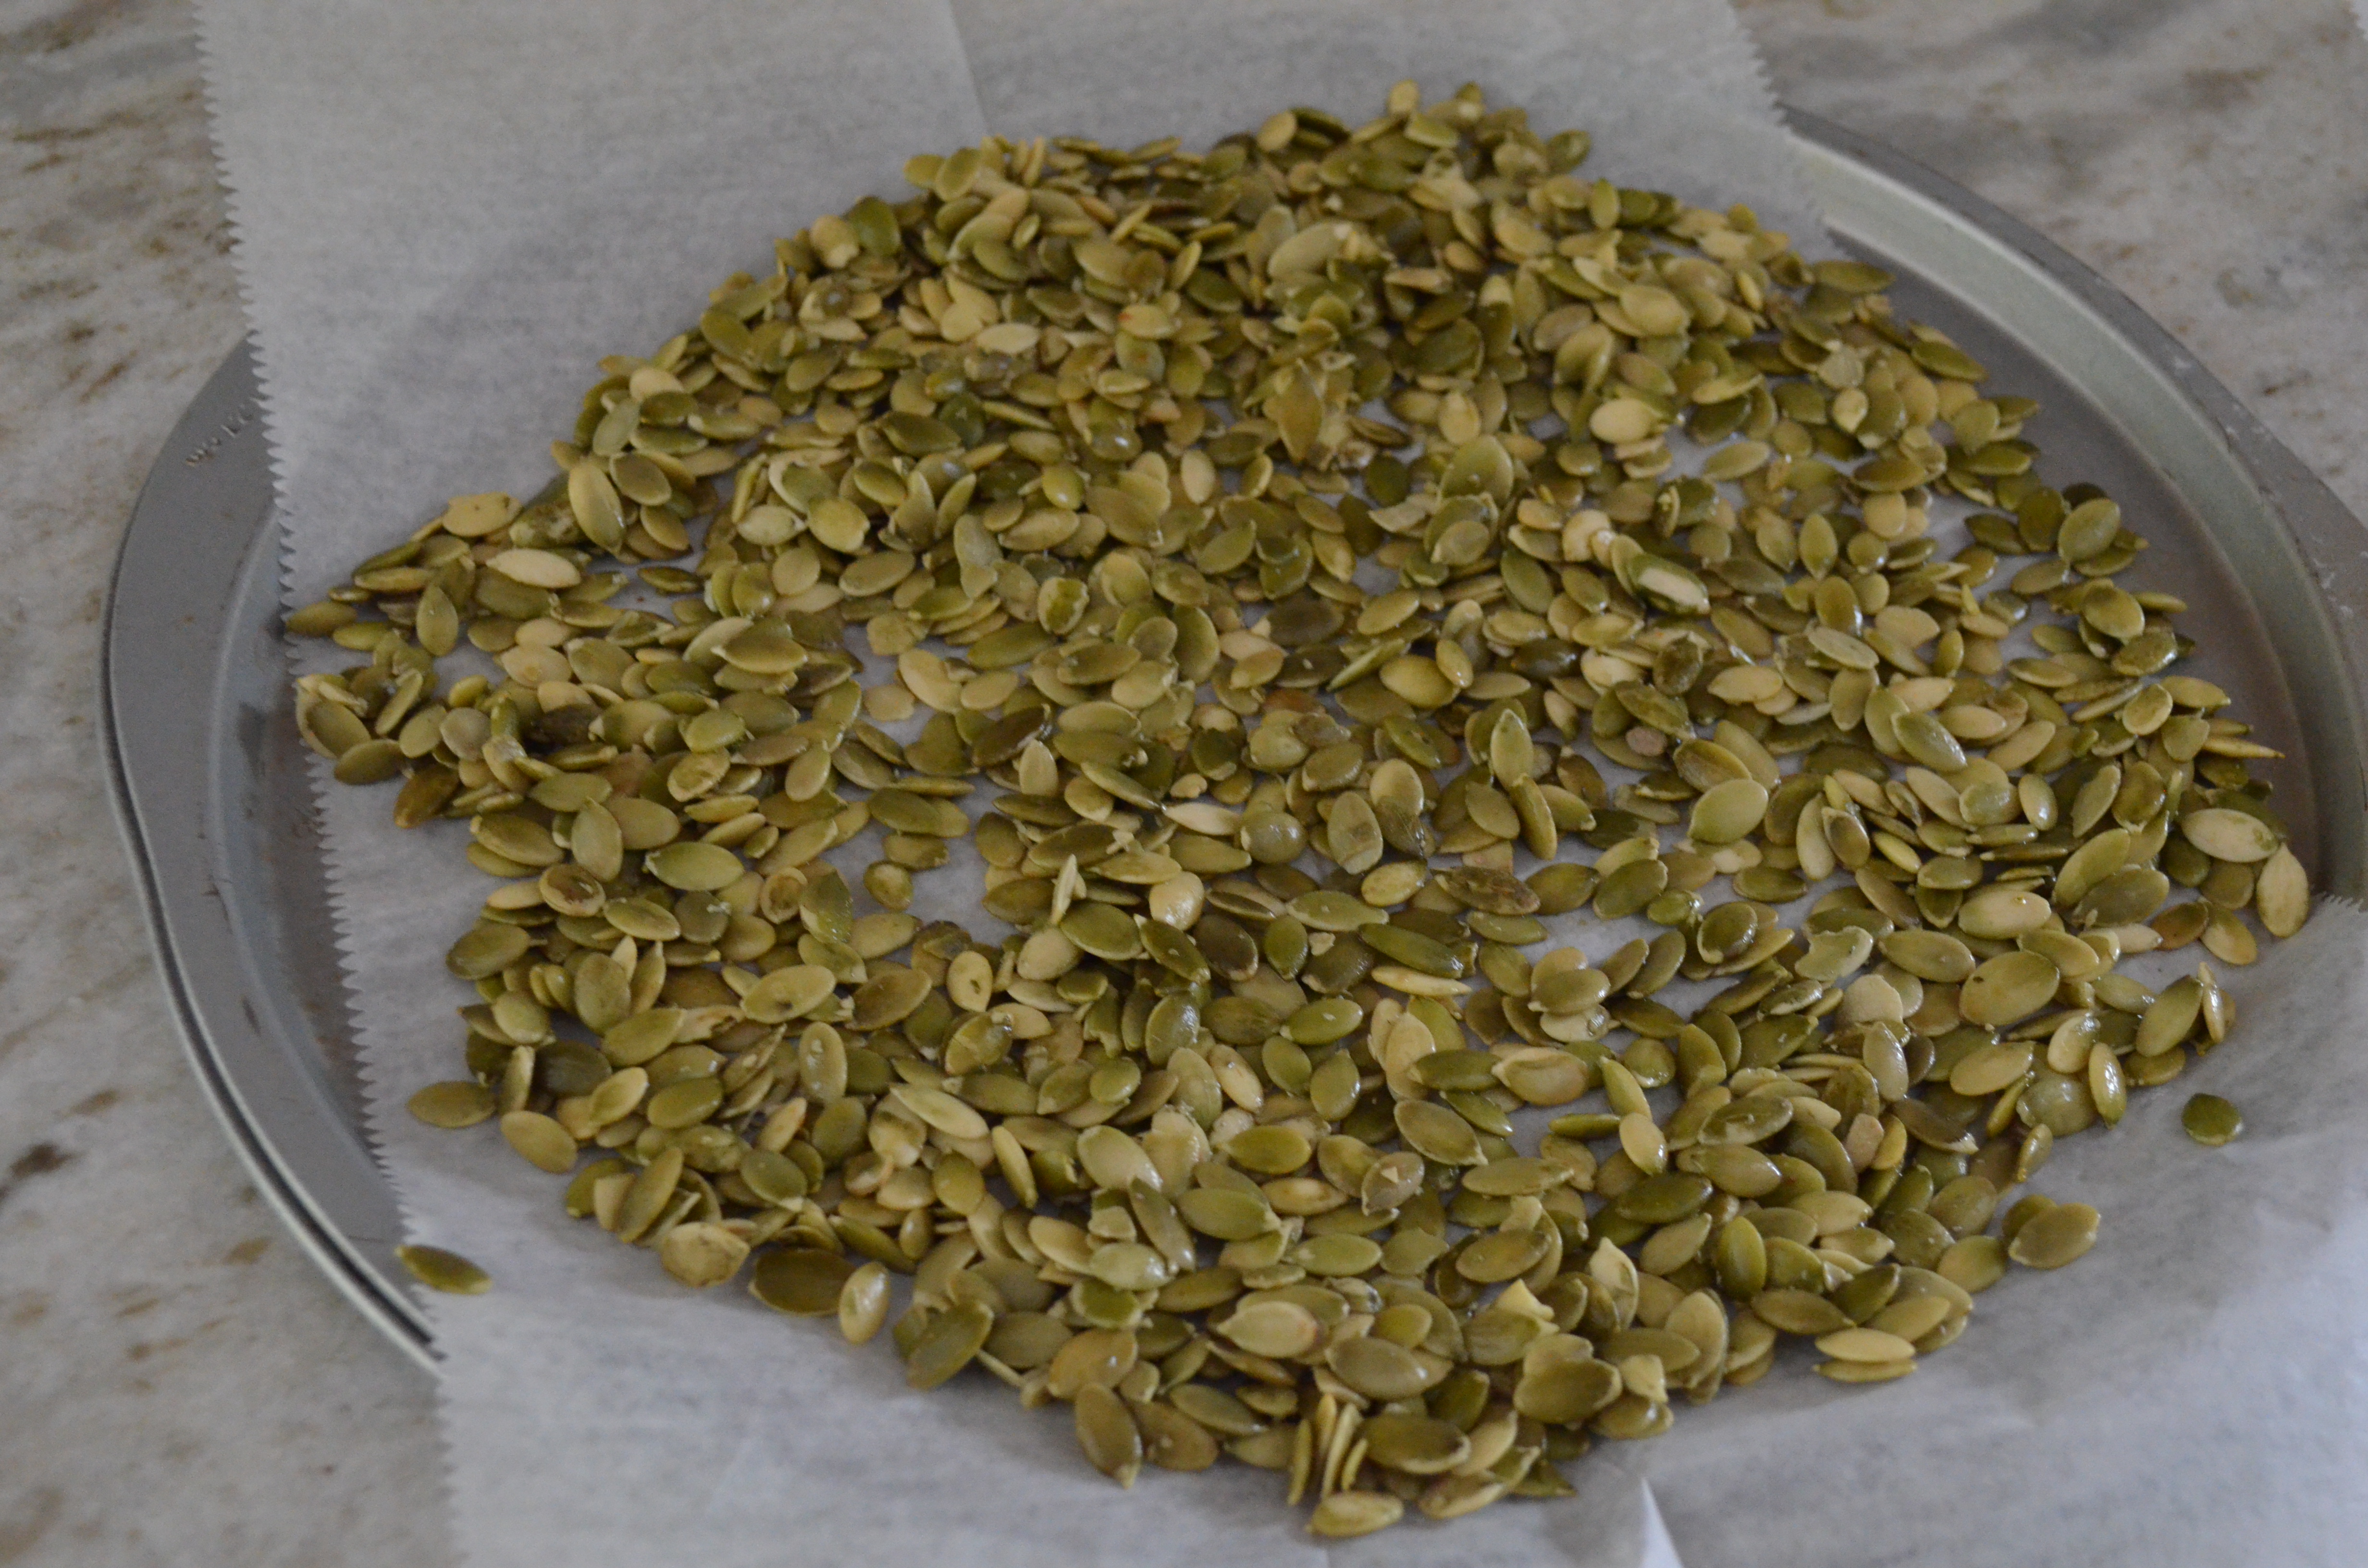
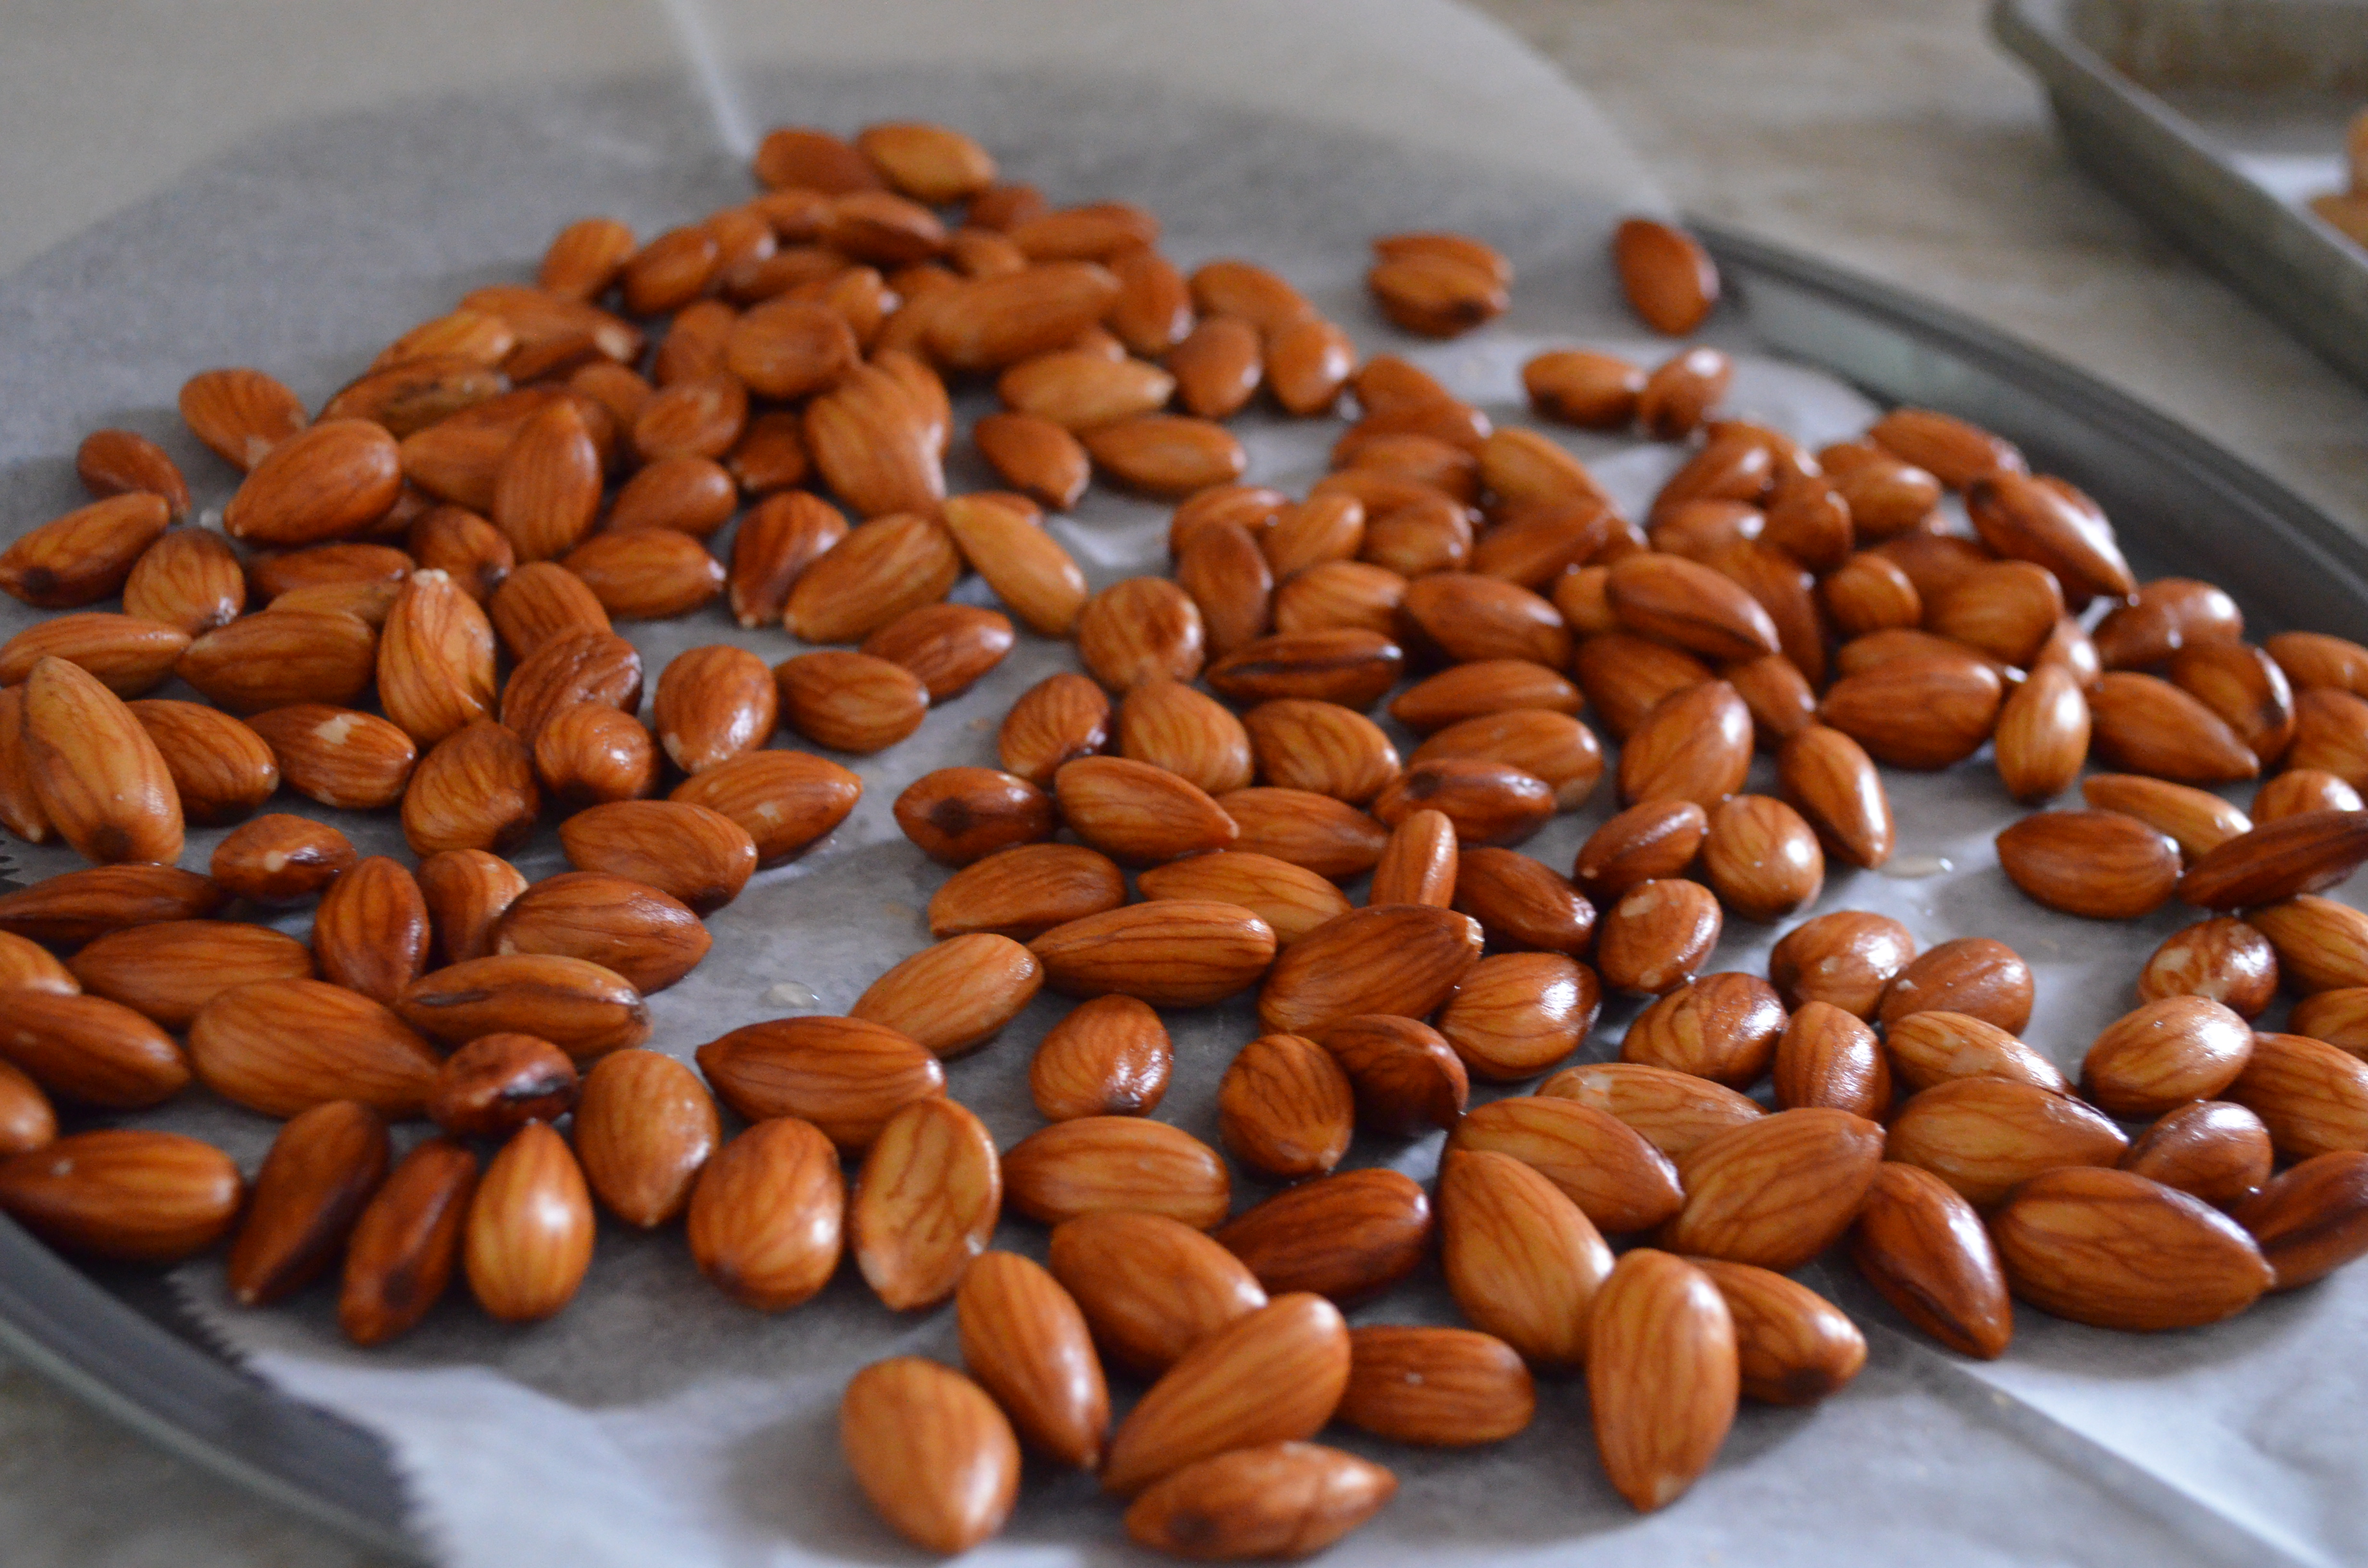
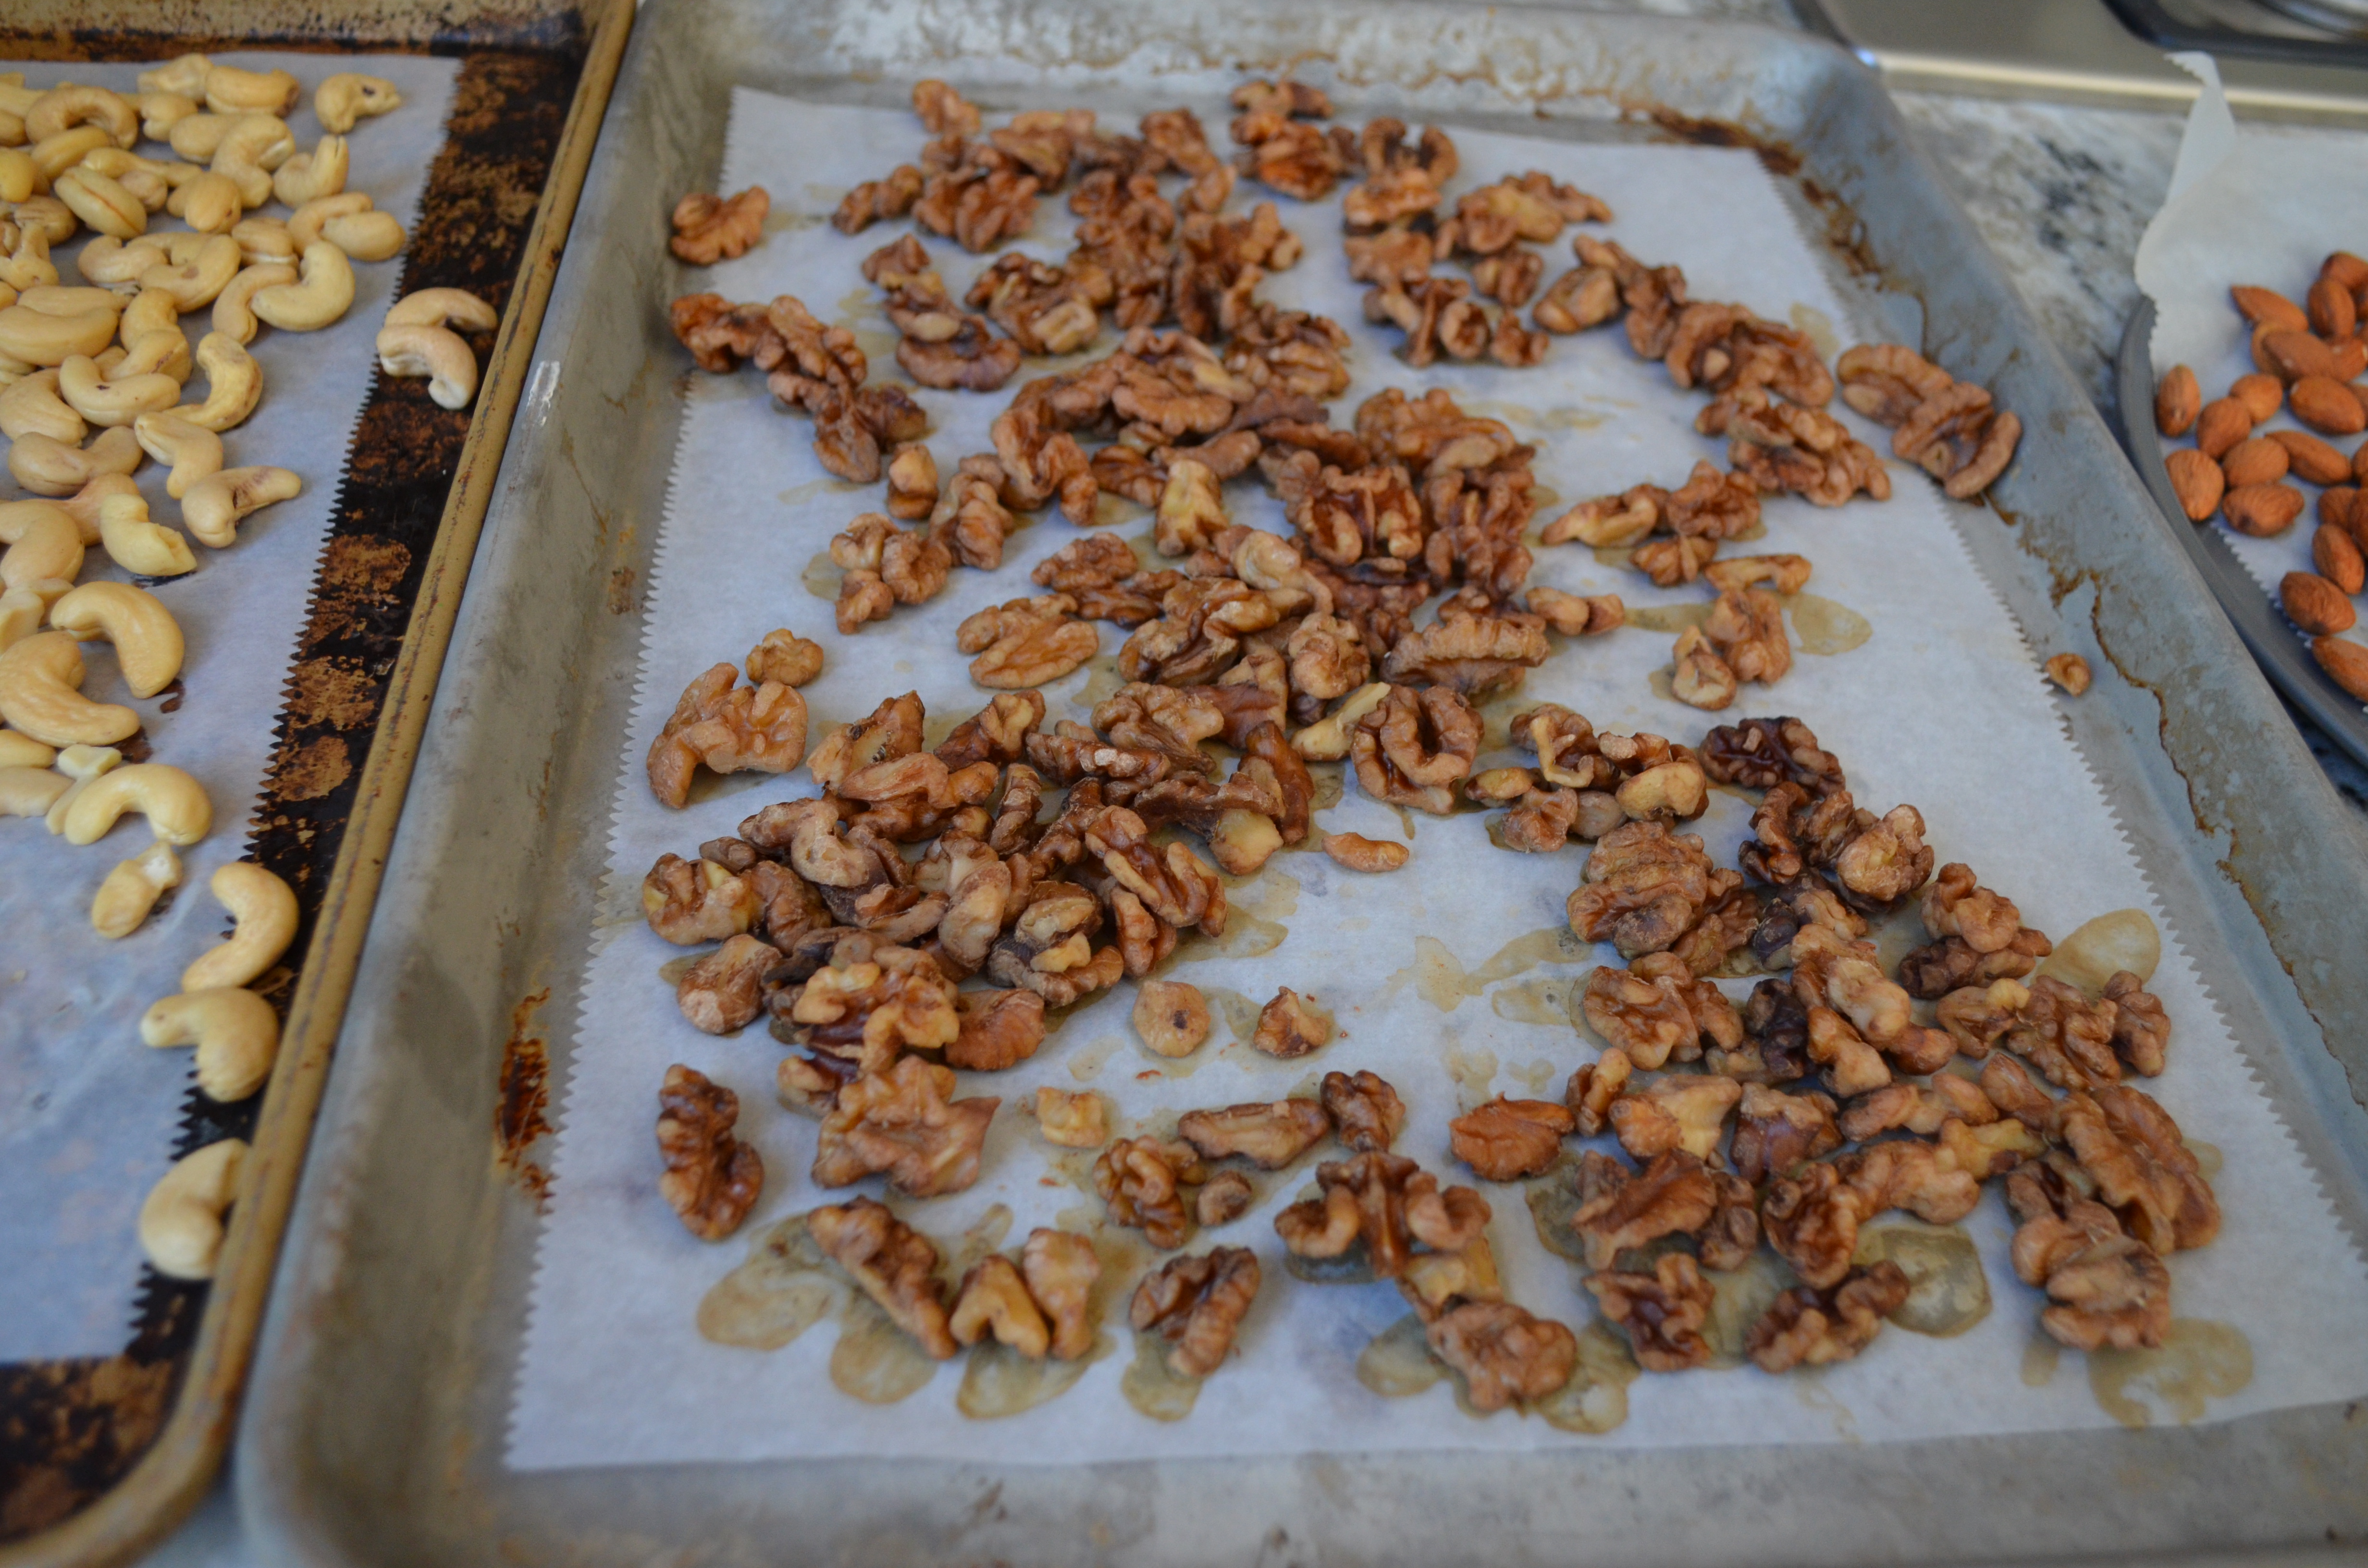
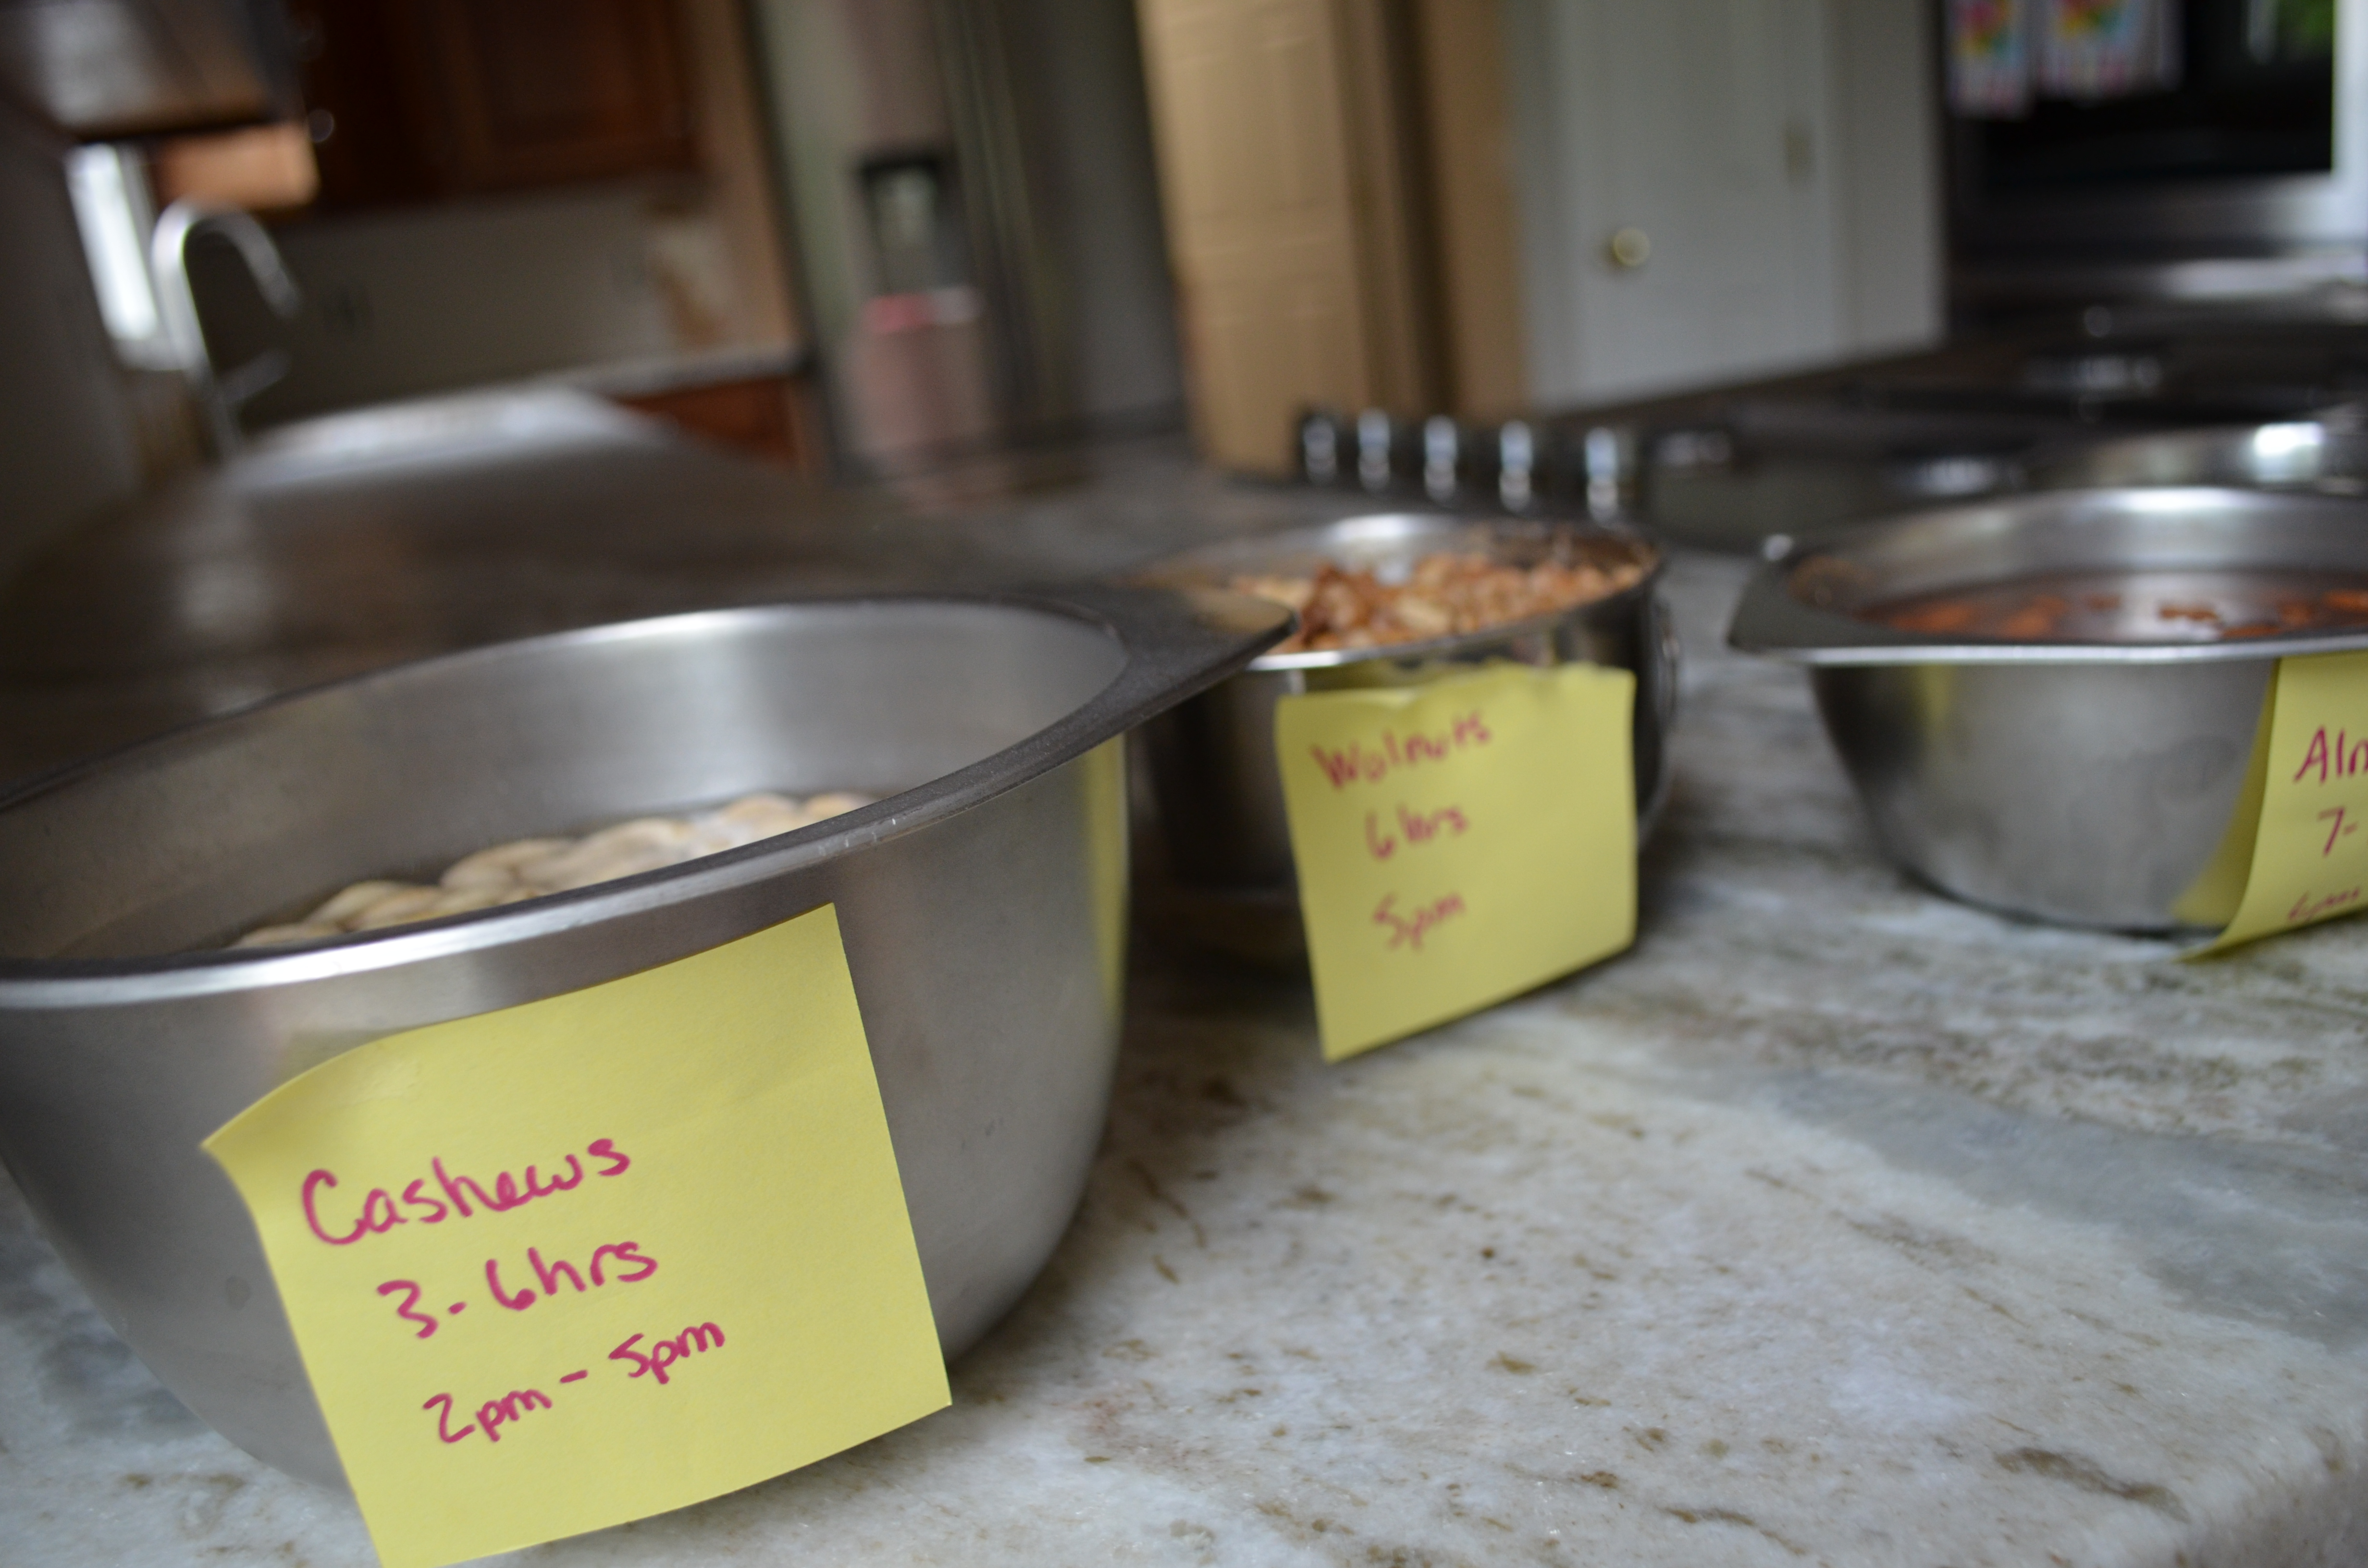
The next step is to soak.  Measure out the nuts in four separate bowls.  3 cups each of cashews, almonds, and walnuts; 1 cup of pumpkin seeds.  Fill each bowl with warm water until the nuts are covered by an inch.  The nuts will absorb the water while soaking, so you want to make sure there is plenty of water in the bowl.  Next, add salt:  2 teaspoons each for cashews, almonds, and walnuts; 1 teaspoon for pumpkin seeds.  I lined up my bowls in order of soaking times and noted the end time for each nut.  The recommended soaking times are as follows:  Cashews 3-6 hours, Almonds 7-8 hours, Walnuts 6 hours, and pumpkin seeds 7-8 hours.

After the nuts have soaked, drain them in a colander and spread out on a baking sheet lined with parchment paper.  Dehydrate at the lowest setting on your oven, 150 being preferable.  (On my oven, this is actually the “keep warm” setting.)  Dehydrate for 12-24 hours until the nuts are dry but before they brown.  Note:  my oven automatically shuts off after 12 hours, so make sure to reset your oven before that expiration if you want crispier nuts.

Next, prepare the sauce. 

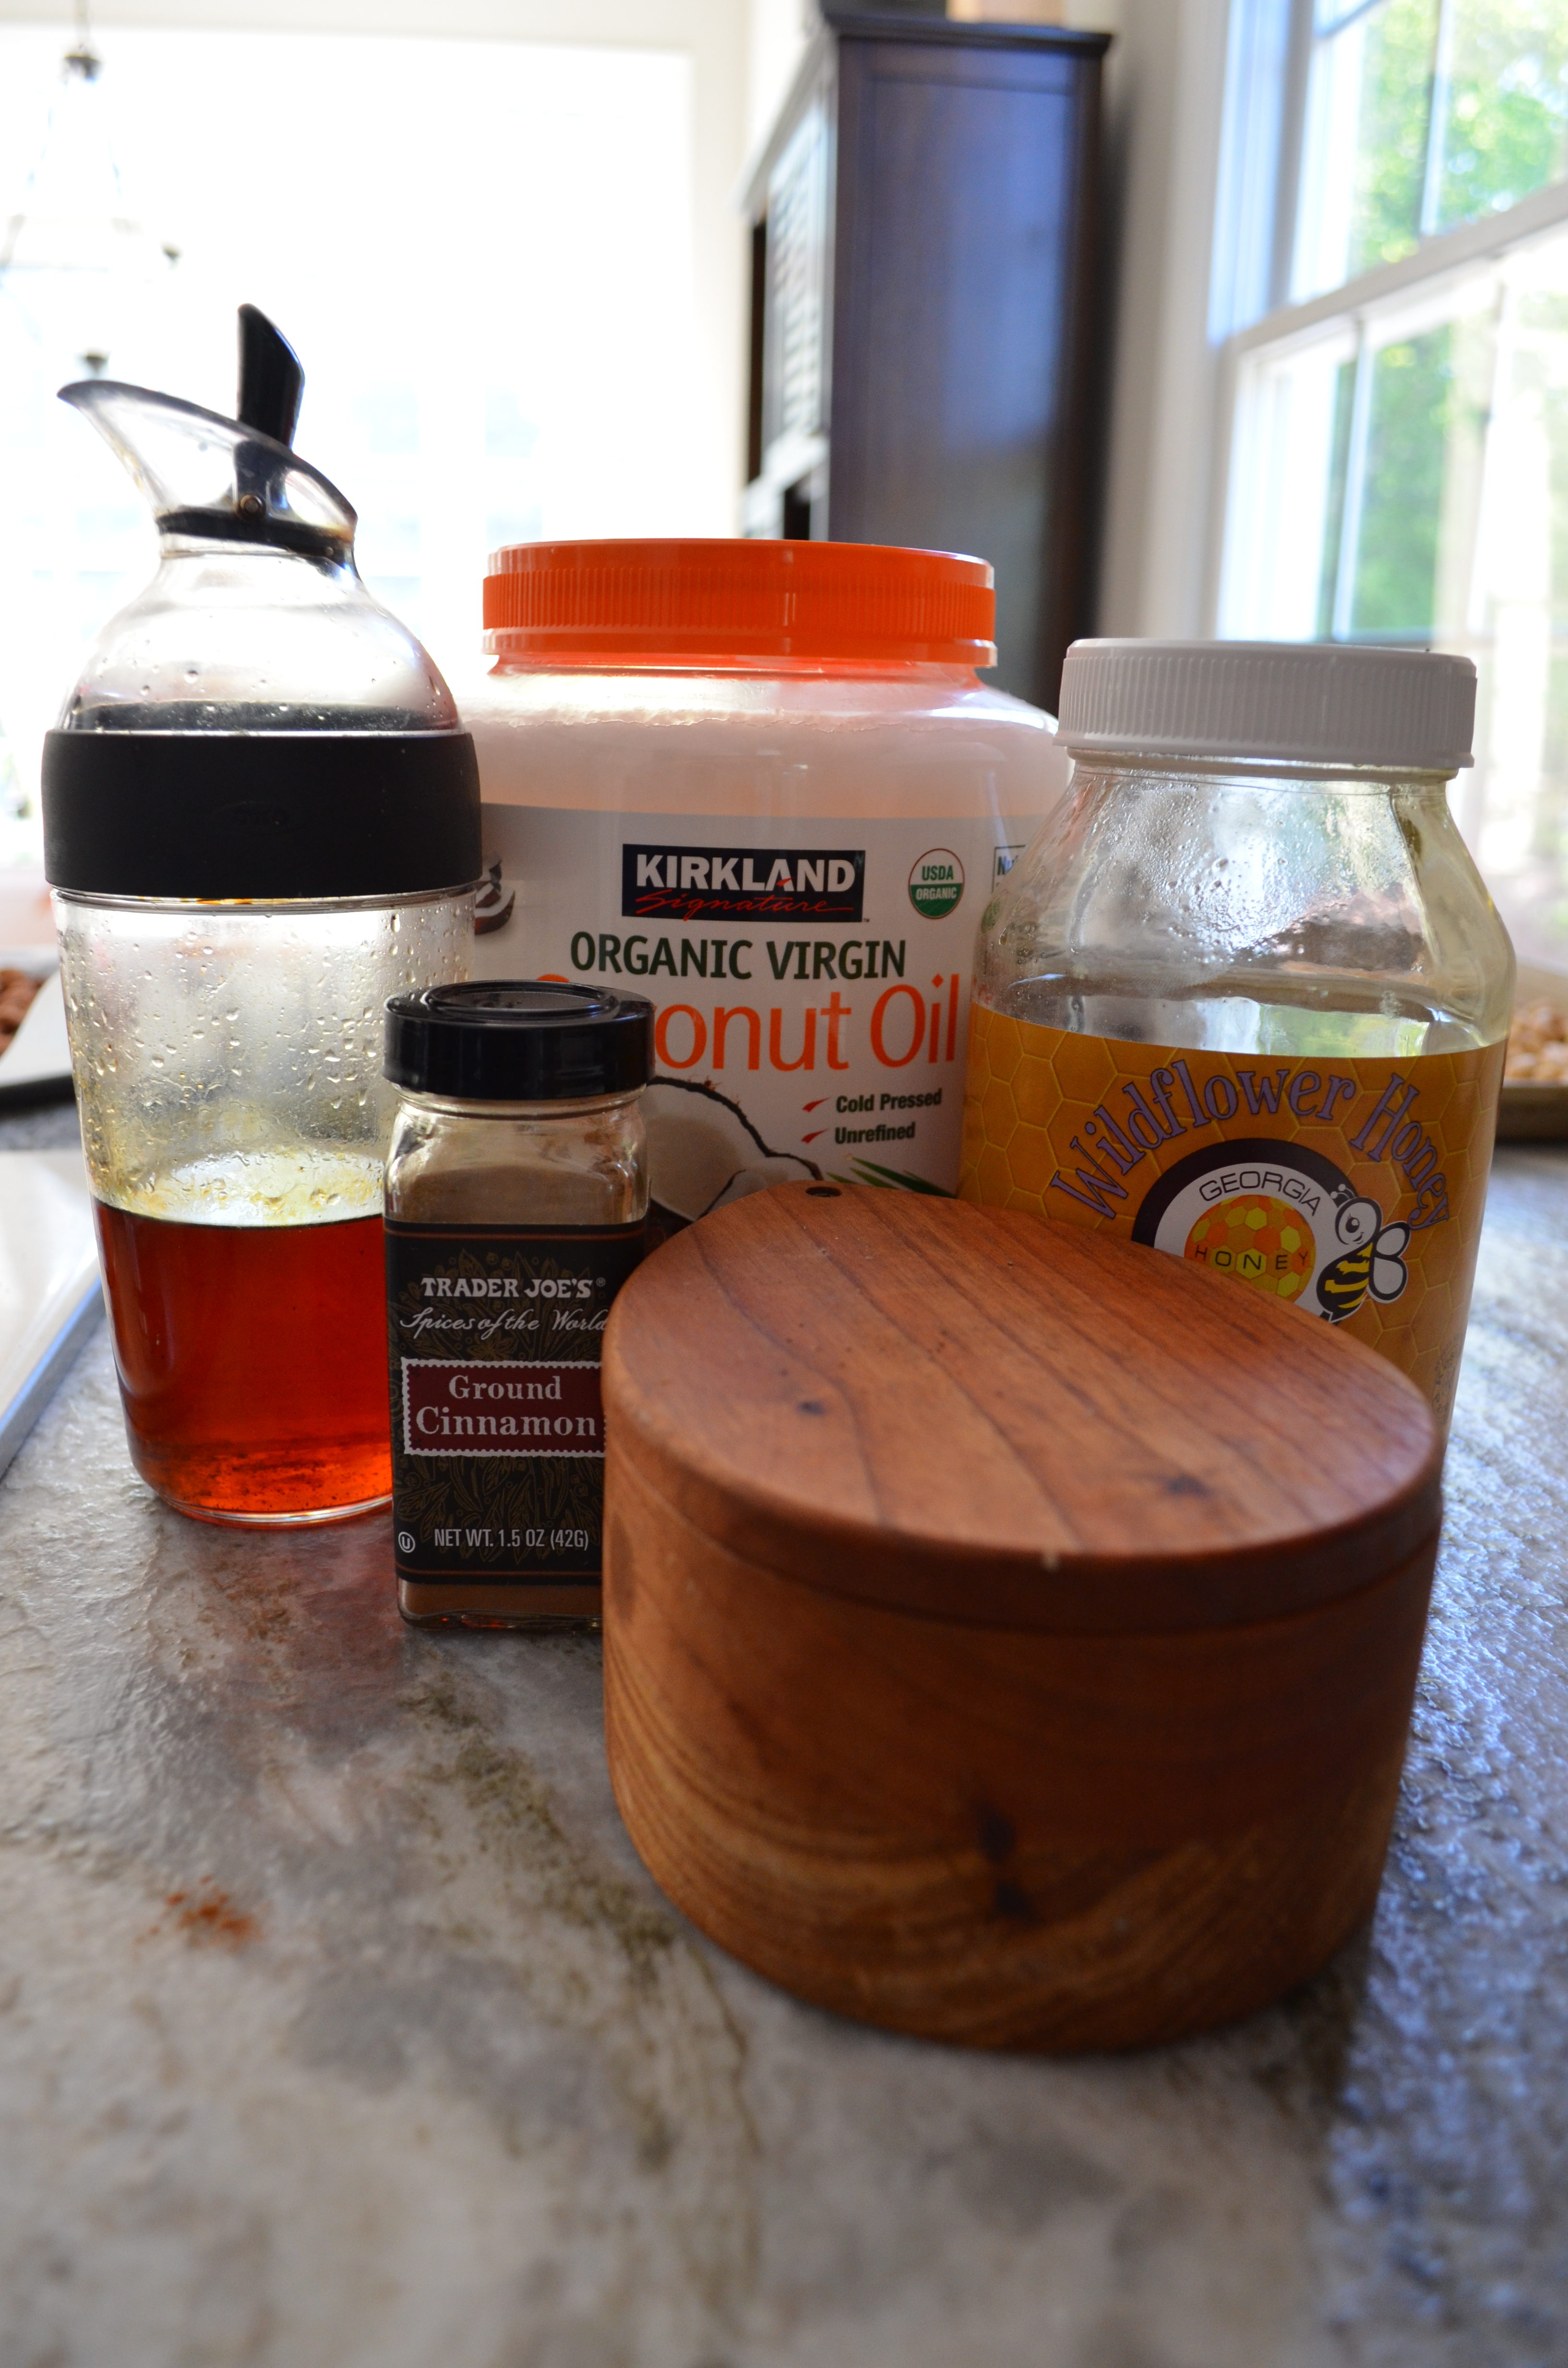
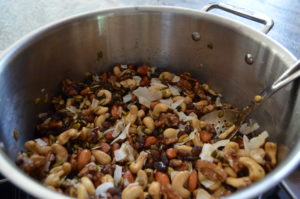
In a large stockpot on low heat, melt the coconut oil, honey, vanilla, cinnamon, and sea salt until combined.  (Tip: measure the coconut oil first, then use the same measuring cup for the honey.  The oil will keep the honey from sticking to the measuring cup.)  Then, pour all of the crispy nuts into the pot and stir until coated.

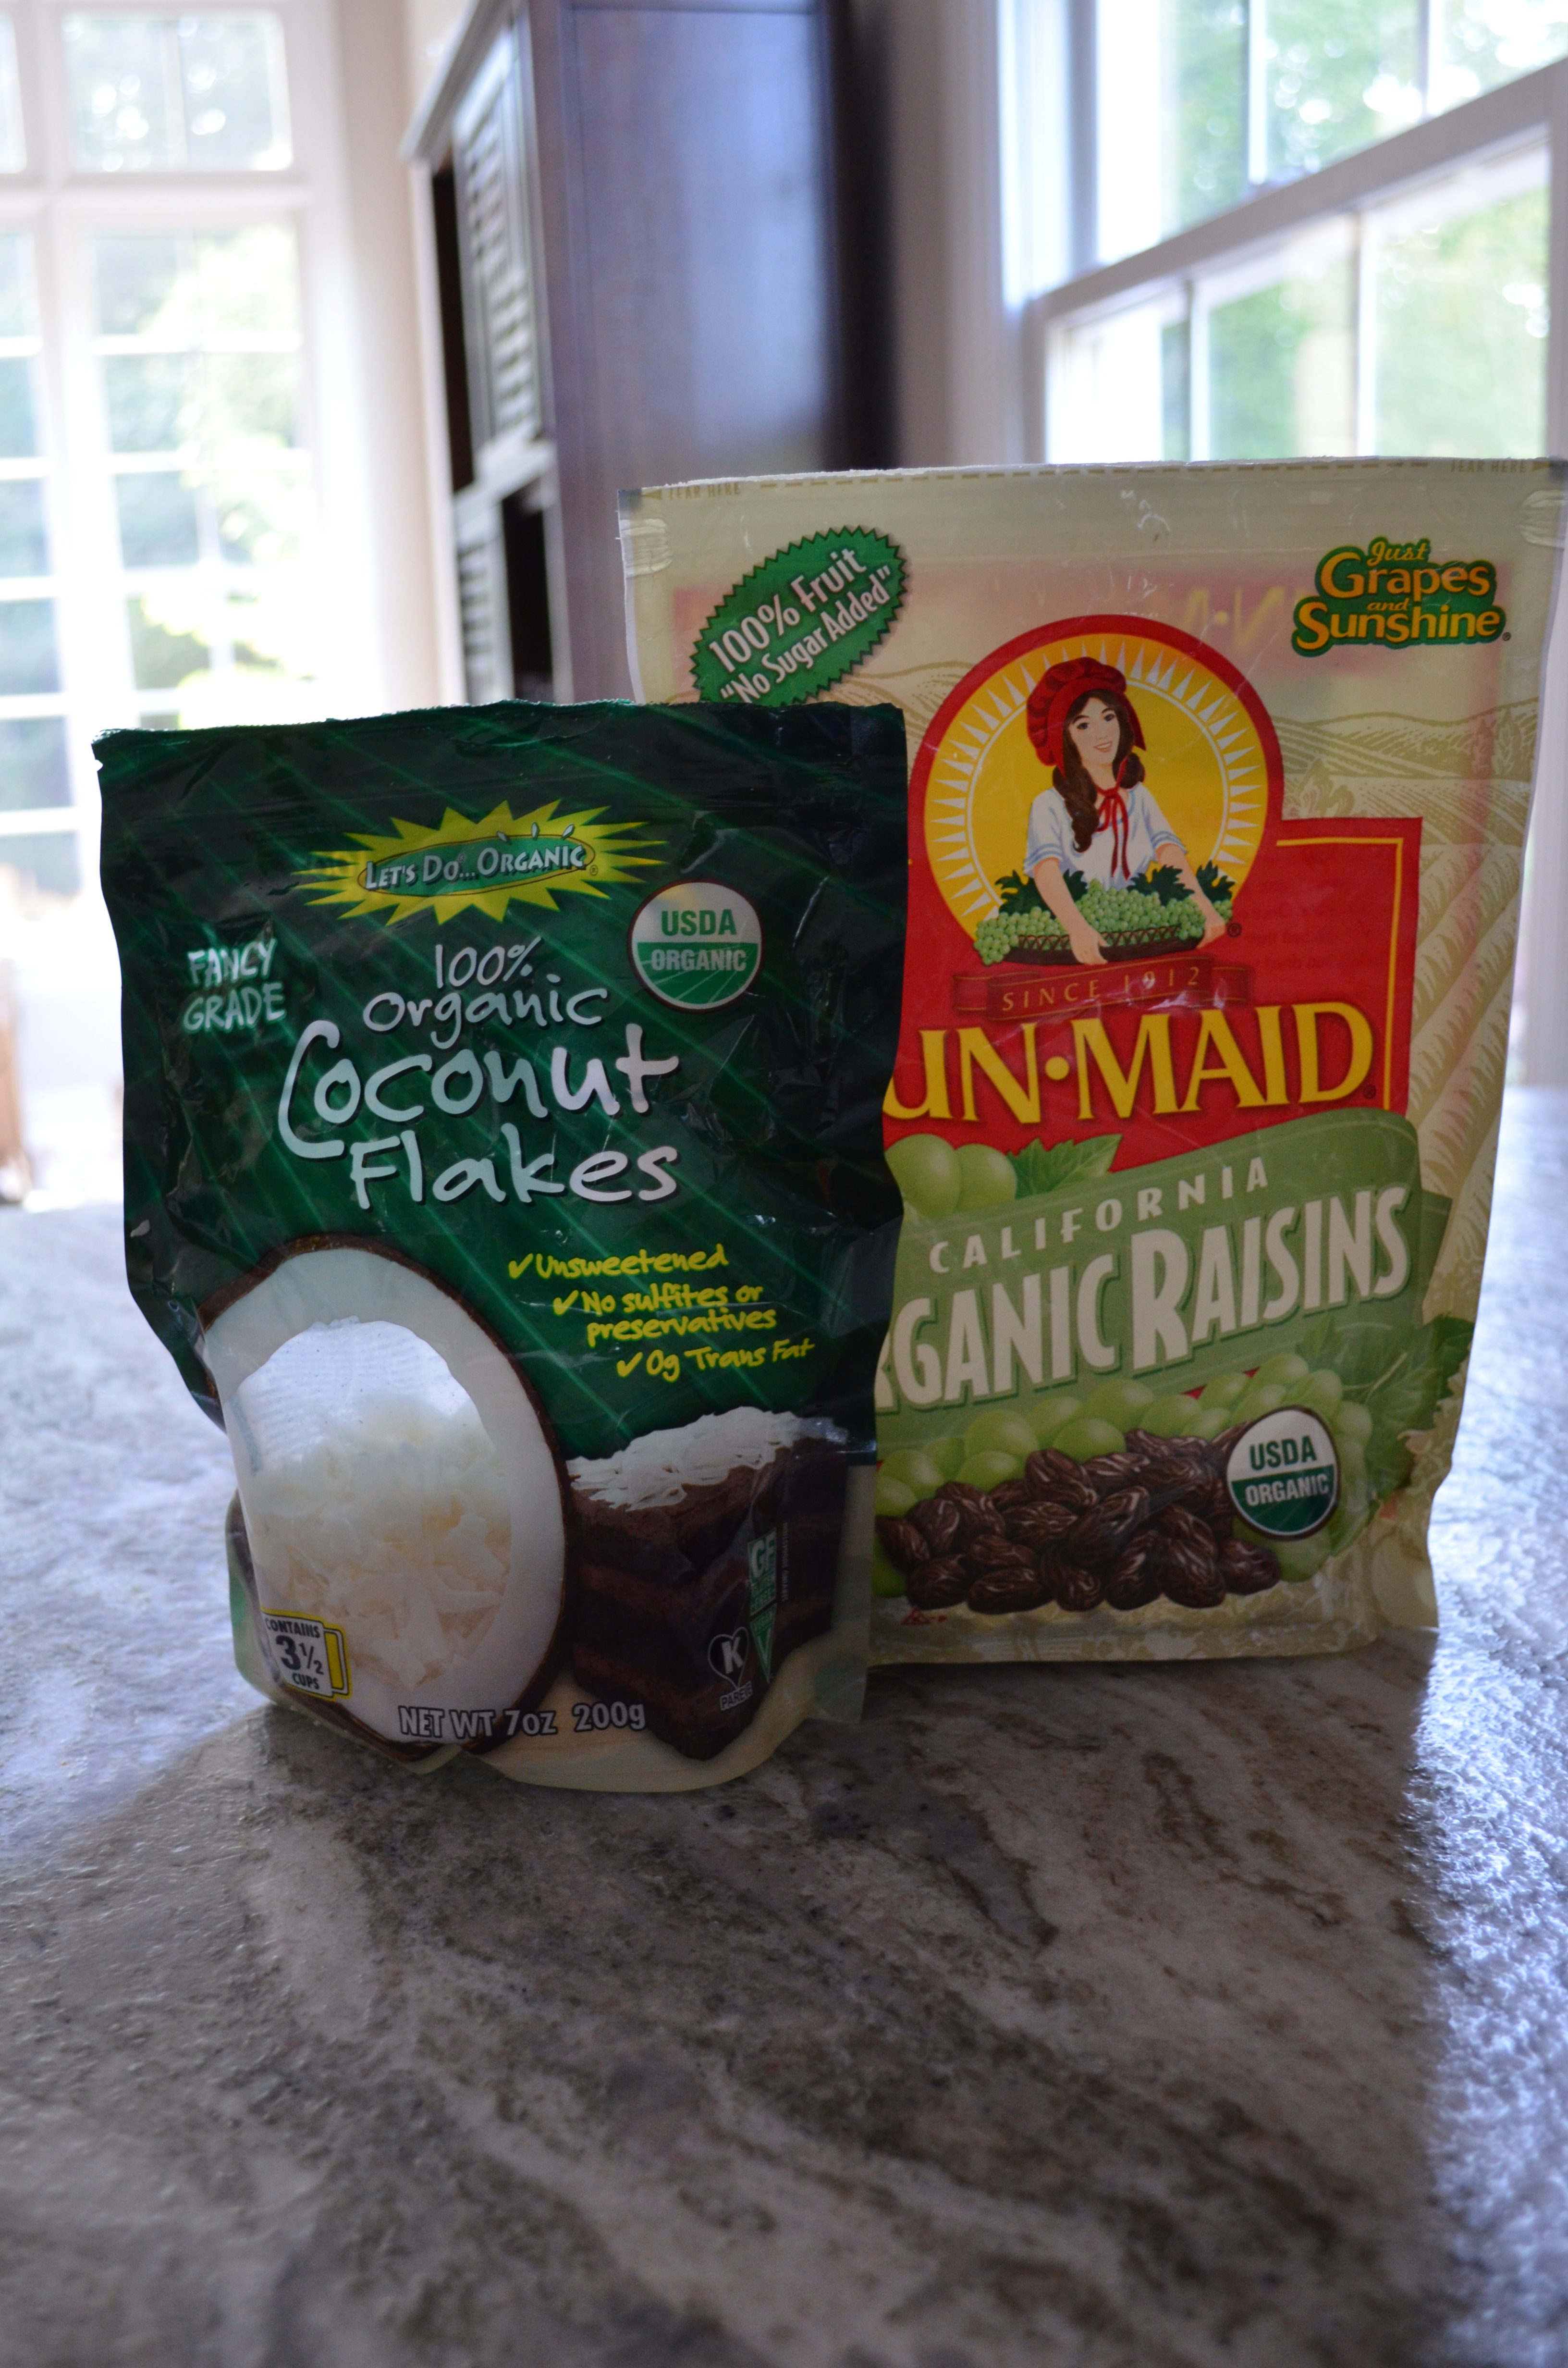
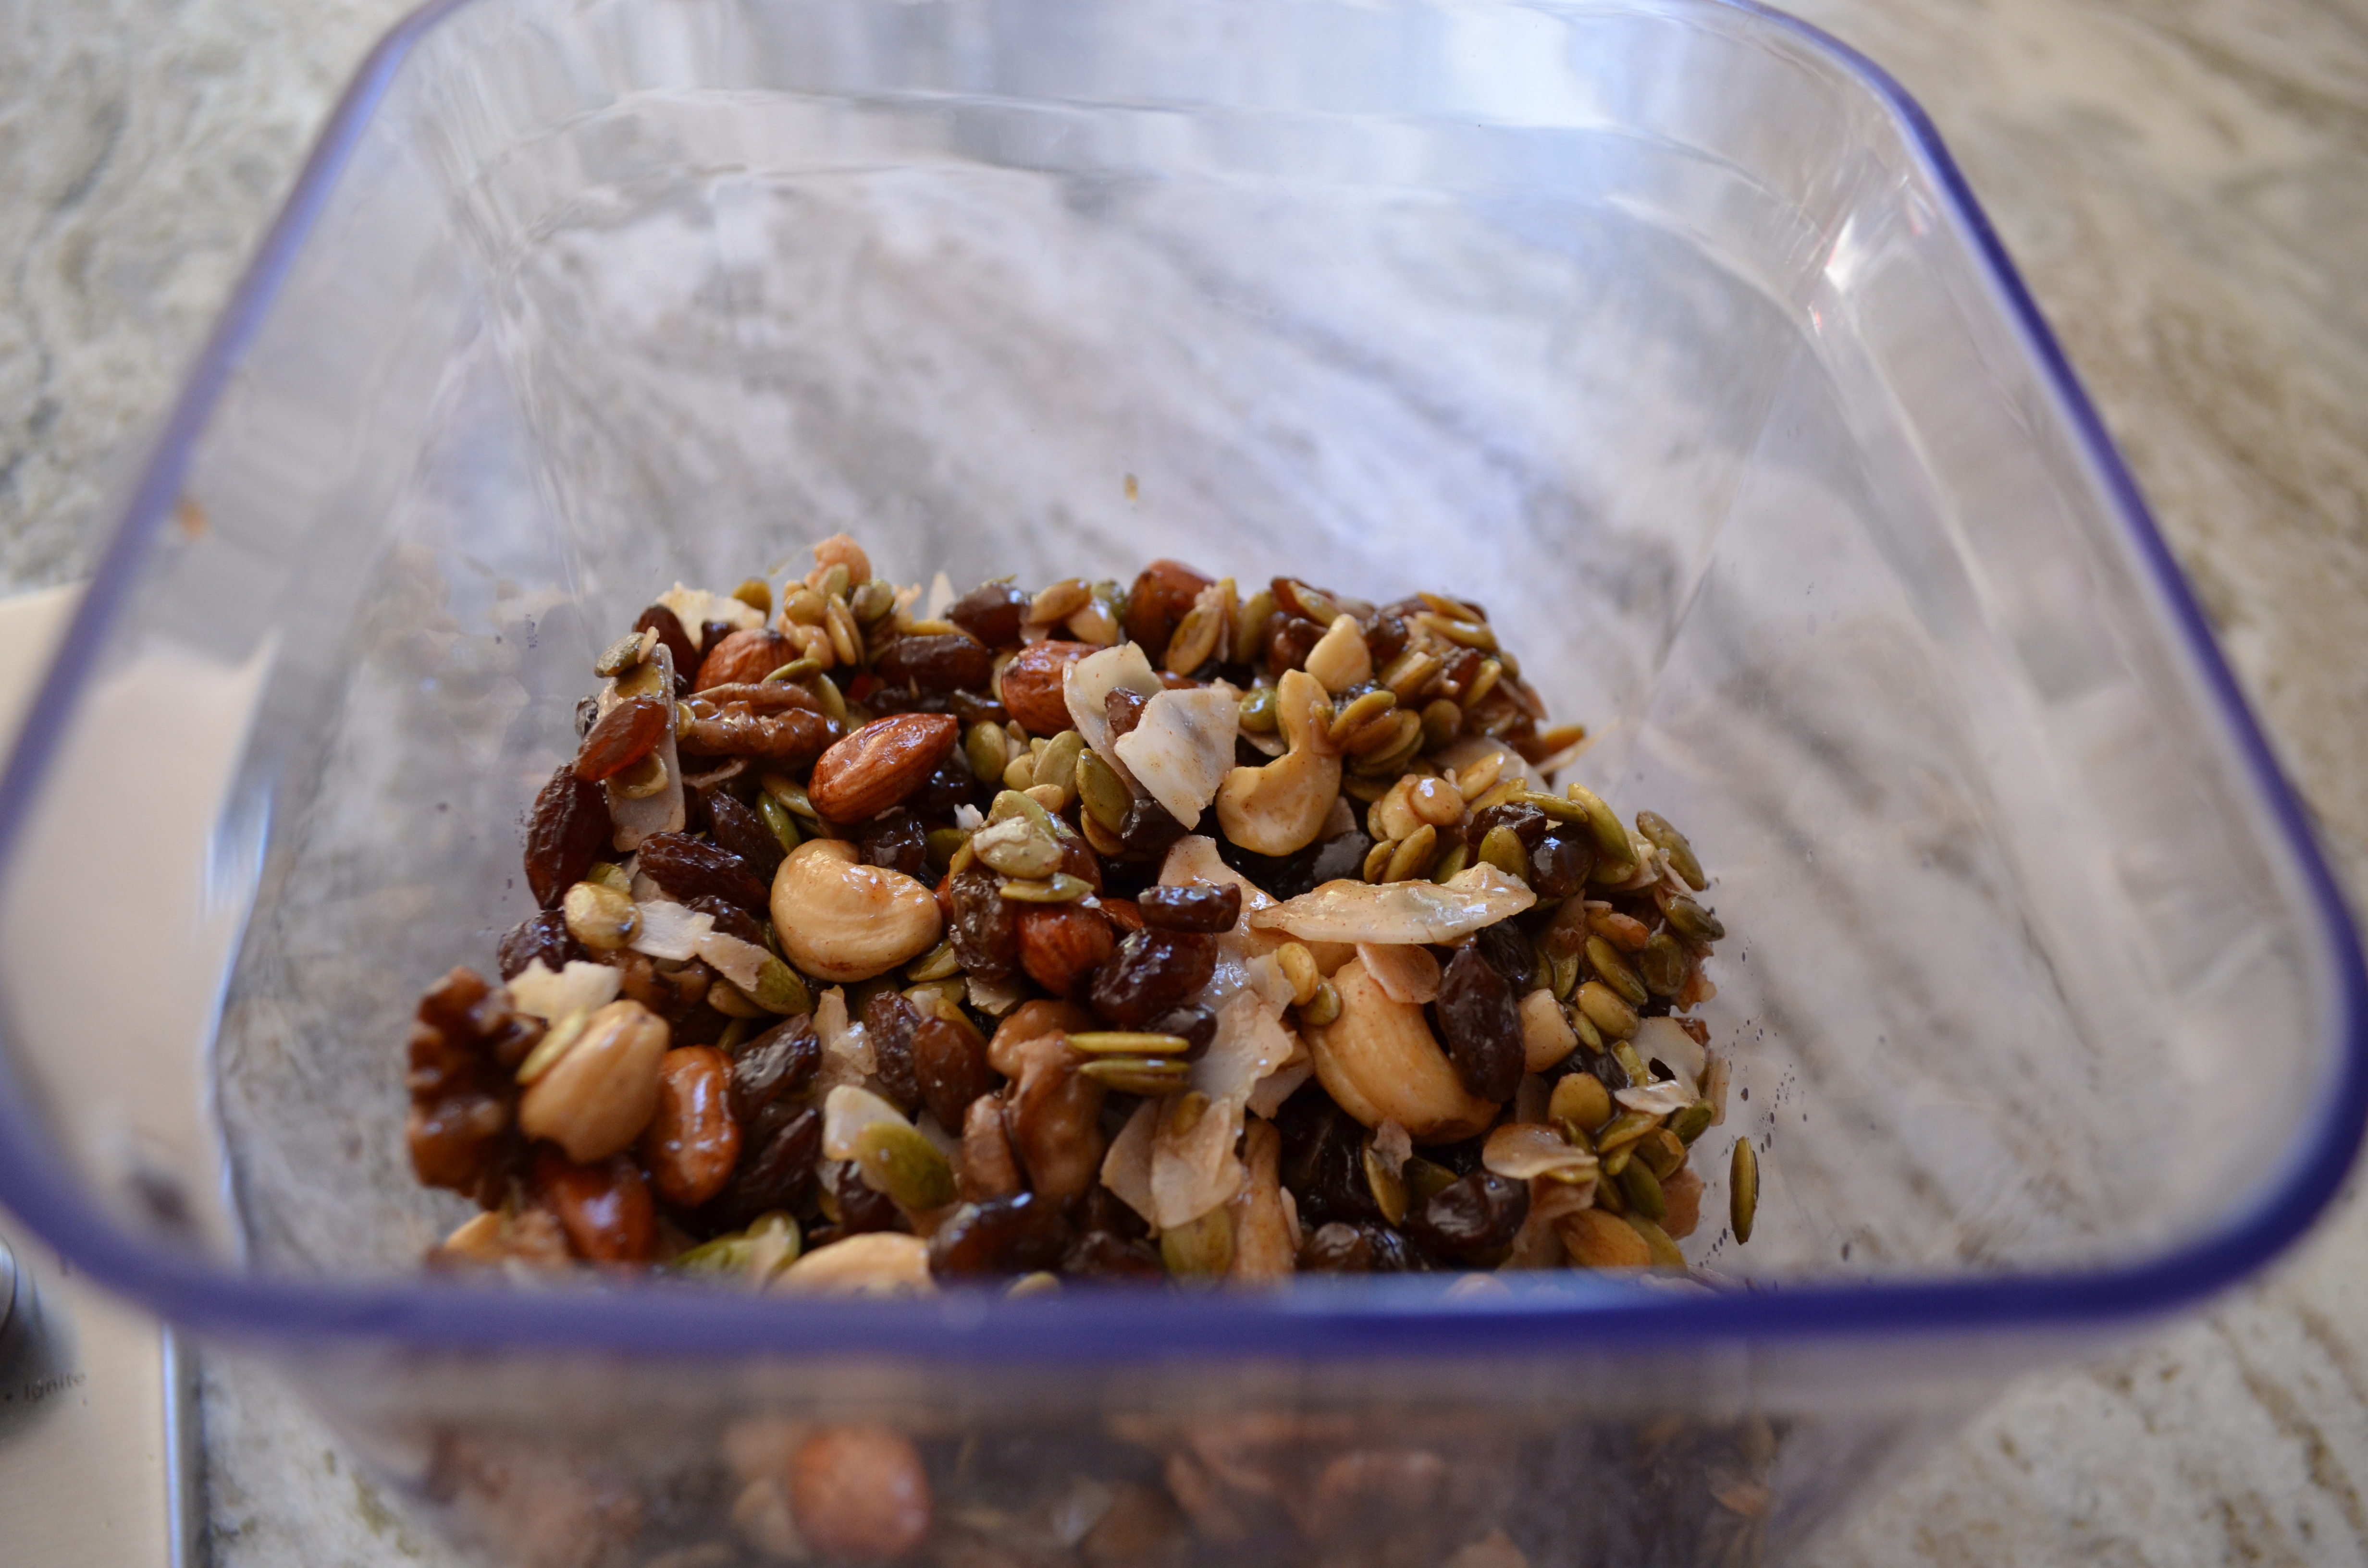
Add in the coconut flakes and the raisins.

Voilà!  The perfect GAPS snack!

I store mine in an OXO Good Grip Container (available at Bed, Bath & Beyond with a coupon 😉 ) in the pantry; store in the fridge for a less-sticky version.

Bon Appétit!


Nutola
Yields 1
A delicious GAPS snack!
Write a review
Print
Ingredients
  1. 3 cups raw almonds, soaked and dehydrated
  2. 3 cups raw walnuts, soaked and dehydrated
  3. 3 cups cashews, soaked and dehydrated
  4. 1 cup pumpkin seeds, soaked and dehydrated
  5. 1/4 cup coconut oil
  6. 1/4 cup raw honey
  7. 1 TB vanilla
  8. 1 TB cinnamon
  9. 1 1/2 tsp Celtic sea salt
  10. 2 cups organic unsweetened raisins
  11. 1 cup shredded coconut
Instructions
  1. Combine coconut oil, honey, vanilla, cinnamon, and sea salt in a large stock pot over low heat until fully mixed. Turn off heat.
  2. Add in nuts and mix until coated.
  3. Add in raisins and coconut and mix well.
  4. Store in an airtight container. Can be stored in the pantry, but best if stored in the fridge.
Listfull Days http://listfulldays.com/
Share on Facebook

Meatless Monday: Veggie Fried Rice

Posted on

“Chicken and Rice.” This is currently one of Munchkin’s favorite meals.  If we ask him what he’d like to eat, no matter the time of day, the answer is usually “chicken and rice.”  Now, rice is not generally one of my favorites.  At any Mexican restaurant, I will gladly take double the refried beans over rice and beans.  But, I LOVE fried rice!  Hibachi, anyone?  I’d seen some recipes floating around Pinterest and decided to give it a go. 

I’ve made this recipe several times now and have combined several recipes into this one.  This recipe is perfect for Meatless Monday because it’s quick and easy, but you could also easily add some cooked chicken or any other protein you happen to have on hand.  I made a full recipe of rice last week for my stuffed peppers, but I only used a portion of it, so I had just enough left over for this recipe without having to make any more.  It doesn’t look like much going into the crock pot, but we always have plenty for seconds and leftovers.  😉


Veggie Fried Rice

Veggie Fried Rice

Veggie Fried Rice
Write a review
Print
Ingredients
  1. 2-3 cups cooked brown rice
  2. 3 TB butter
  3. 1 TB sesame oil
  4. 2 TB soy sauce
  5. 2 TB Worcestershire sauce
  6. 1/4 tsp salt
  7. 1/2 tsp pepper
  8. 4 garlic cloves, minced
  9. 1 TB minced or grated ginger
  10. 1 onion, diced
  11. 1 red bell pepper, diced
  12. 1 frozen bag of peas and carrots
  13. 1 cup broccoli (optional - I use if I have on hand)
  14. 1 cup corn (option - I use if I have on hand)
Instructions
  1. Combine all the ingredients in a crock pot. Cook on high for 2 to 3 hours, just long enough to cook the eggs.
Listfull Days http://listfulldays.com/
Share on Facebook

Meatless Monday: Stuffed Peppers

Posted on

I am terrible about using up food in our refrigerator, but I am trying to be better.  I menu plan several days at a time, but it never fails that I have left over ingredients that end up in the trash can.  Not only is this wasteful of good food, but it is also unnecessarily expensive.  I’ve been cleaning out our fridge on a weekly basis when I menu plan so that I can see what ingredients I should include in the upcoming week’s meals.  Certain ingredients obviously keep a long time in the fridge, but if I have leftover parsley, I can be sure to use it up in the next couple of days.  I call it the Fridge Challenge.  This is also a good way to see what I’m buying that we are not eating.  For instance, I always seem to have a giant bag of baby carrots in the fridge.  Untouched.  I KNOW carrots make a great snack, but I never seem to CHOOSE carrots for my snack.  So, on my menu this week is homemade hummus.  Maybe then I’ll eat those carrots.  (Or, at least, they’ll make a colorful spoon! 😉 )

Today’s recipe is a great way to use up leftovers.  You could use so many different ingredients to make your own custom recipe.  This is actually one of hubby’s favorite dinners.  He knows they are easy and cheap, so whenever I ask him for ideas to fill in during menu planning, he picks this one often.  Another reason I love this recipe is that it cooks in the crock pot but only for a couple of hours.  This is very easy to throw together at the last minute. 

Last week, I made my fabulous black bean chili.  Now, I’m not kidding when I say that this recipe makes a ton.  We ate it for lunch and dinner for a couple days, and I froze a couple pints for future use, and I STILL had some leftover.  So, I decided to use up those leftovers in some stuffed peppers.  Chili really makes a great leftover; there are so many ways you can use it!  I mixed it with some rice and tomatoes, and voilá! Yummy dinner!  Don’t forget your favorite chili toppings!  We topped ours with Greek yogurt. 🙂


Stuffed Peppers

Stuffed Peppers

Stuffed Peppers
Write a review
Print
Ingredients
  1. 4 green peppers, tops and seeds removed
  2. 1 1/2 cup leftover chili (Use black bean chili for meatless!)
  3. 1 cup cooked brown rice
  4. 1 can diced tomatoes with green chiles
Instructions
  1. Combine the chili, rice, and tomatoes. Scoop into the prepared green peppers. Place in the crockpot, making sure that the peppers stay upright. Cook on high for 2 hours. (If you like your peppers softer, cook for longer.)
Notes
  1. Look for green peppers with flat bottoms. This will ensure that the peppers stay level in the crock pot 😉
  2. Also, when cutting off the tops of the peppers. I like to insert the knife perpendicular to the top and cut in a circle around the stem. This will also cut off most of the ribs of the pepper inside making clean out very easy!
Listfull Days http://listfulldays.com/
Bon Appétit!

Share on Facebook

One Pot Wonder Wednesday: Taco Stew

Posted on

I found this recipe years ago!  In fact, the printed date on the recipe is 2009.  This is definitely a favorite, although I tend to forget about it.  We make crock pot chili fairly regularly, so I have to be careful on chili-esque overload.  The great thing about this recipe, though, is that it comes together so quickly!  As in, less than 30 minutes.  This is the perfect mid-week meal when the last thing you want to do is spend hours in the kitchen.  Unless your kitchen has wine, in which case, I will gladly spend hours there 😉 

I adapted this recipe from Whole Foods’ Mexican Taco Stew.  If you haven’t checked out their website for recipes, you should know that it is a great resource.  They also have some great categories for whatever requirements you may have when menu planning.  I especially like their budget category and have made many recipes in that category over the years. The original recipe calls for taco seasoning.  While I’m sure Whole Foods has a great option free of preservatives, I have really moved away from using any pre-packaged spices.  After our g-free experiment and years of reading about the food industry in general, I’ve adopted the philosophy of making as much of my food at home and that includes spice mixes.  Not only can I better control preservatives and hidden ingredients, such as gluten where it doesn’t belong, I hardly ever have to worry if I have a certain spice in the pantry.  I also added additional zucchini to the recipe to make sure we’re getting enough greens.  Then, I don’t have to worry about a side salad 😉  Add a little Greek yogurt and shredded cheese for some oomph!


Taco Stew

Taco Stew

Bon Appétit!

Taco Stew
Write a review
Print
Ingredients
  1. 1 lb ground beef
  2. 1 onion, diced
  3. 2 garlic cloves, minced
  4. 1 TBS chili powder
  5. 1/4 tsp garlic powder
  6. 1/4 tsp onion powder
  7. 1/4 tsp oregano
  8. 1/2 tsp paprika
  9. 1 1/2 tsp cumin
  10. 1 tsp salt
  11. 1 tsp pepper
  12. 2 cups organic low sodium chicken broth
  13. 2 zucchini, cut into bite size pieces
  14. 1 1/2 cups black beans (or 1 can)
  15. 1 can diced tomatoes
  16. 1 jar of salsa
Instructions
  1. Over medium high heat, brown ground beef in a soup pot. Remove, drain, and set aside. Then, sautée the onion and garlic in the soup pot until translucent. Add the ground beef to the onion and garlic. Add in the spices and stir until combined. Add in the remaining ingredients, cover, and simmer for at least 15 minutes.
Adapted from Whole Foods Market
Listfull Days http://listfulldays.com/
Share on Facebook

Meatless Monday: Sage Butter Pasta with Figs & Butternut Squash

Posted on

Tonight’s recipe has been on our weekly rotation for the past couple of weeks.  I’ve been experimenting with different kinds of pasta, and it’s just that good!  The recipe developed when I went to the farmer’s market a few weeks ago and bought some fresh Gorgonzola ravioli in the fridge section.  I was trying to come up with a sauce that would work well and decided that some simple butter would be delicious.  For Christmas Eve, I made a cheese ball that called for sage sautéed in butter.  It was amazing!  I thought I could possibly make this into a sauce for my ravioli. 

Turns out, I’m not the first person who has thought of this combination.  I looked at many recipes for ravioli with butter and many of them included sage.  Well, at least I knew it was going to be good!  All of these other people wouldn’t be making it AND sharing it if it were terrible.  Next, I thought about what I could add to make this dish a full meal.  Butternut squash keeps popping up in winter recipes, so it seemed like a good choice.

Finally, with all of this sweet-and-savory thinking, I couldn’t get figs out of my head.  I looked all over for fresh figs, but apparently, they’re not in season right now.  Luckily, I still had the Costco bag of dried figs sitting in my pantry.  Maybe they could work?  You can certainly toss them in as is, which is what I did tonight, but if you want to soften them up a bit, pour some boiling water over them and let them sit while you prep the rest of the meal.  I can’t wait to make this recipe with some fresh figs!  The first time I spot them at the store, I will be buying some!

On a separate but still related note, Hubby and Munchkin went to Fresh Market the other night to get dinner fixings.  Munchkin happened to pick out the best fig and olive crackers.  Hubby picked out a soft goat cheese to go with them.  Seriously – if you live near a Fresh Market, or happen to see these crackers in the store,  buy them!  It was such an amazing combination.  Hubby gobbled them up, too, and he really isn’t a fan of olives.  The figs are definitely the dominant flavor.  Yum!

Raincoast Crisps

Raincoast Crisps

So, after buying the fresh ravioli at the farmer’s market, I was inspired again to try making my own pasta.  My parents went on a big kick many years ago of making their pasta fresh.  I am not exaggerating when I say it’s the best thing you’ve ever tasted.  There is just nothing better than fresh pasta.  It’s not really a difficult practice, but I will say there is an art to it.  And, having the right tools definitely helps.  I don’t have any pasta making tools.  I’m putting them on my wish list now.  😉  I bought some new flour and planned to use the last of the eggs in the fridge.  What could go wrong?! 

Well, on a side note, I am a new owner of a Blendtec blender.  Merry Christmas to me!  Our old Breville was finally on its last leg.  It was a good purchase many years ago, but all of the frozen smoothies were finally adding up, and every morning we were getting a perfume of smoking metal.  Not a good thing.  I decided on the Blendtec partly because of its versatility.  You can make just about anything with it!  So, why not use it to make dough?  I put my eggs in first, and then added the flour.  I pulsed.  And, nothing happened.  Just a blob of congealed flour in the blender.  I tried a few tactics to get it to blend, but no luck.  So, I brought out my KitchenAid mixer to see if that could salvage it.  No luck again.  First attempt at homemade pasta = FAIL!  Luckily, I had some whole wheat pasta spirals in the pantry.  So, instead of stuffing my homemade ravioli with blue cheese crumbles, I sprinkled them on top.  Mmmmm! So good!

Tonight, I gave the pasta another go.  I skipped the Blendtec and broke out my KitchenAid from the get-go.  (I still need to experiment with the Blendtec, but I was more concerned with the pasta experiment tonight.)  I combined 3 cups of white-wheat flour with 7 eggs.  Success!  I rolled it out, mixed up some mascarpone and blue cheese, and proceeded to make my ravioli.  I don’t have a ravioli cutter, so I pressed the two sheets together with a fork.  The dough was a little thicker than I would have liked, probably because I couldn’t get it very thin with my rolling pin.  (I already felt like I was getting in my weight-lifting for the week!)  And, because the ravioli ended up thicker and bigger than store-bought, I think I cooked them a little too long.  WAH WAH!  It can be so disappointing to take the time and make the mess for a cooking experiment to have it not turn out well.  Hubby gobbled it up, but I’m not calling it a win just yet.  I still want to experiment with homemade pasta, but I think I’ll be keeping a box in the pantry as a back up until I’ve had some more practice 😉

At any rate, this recipe would be delicious with fresh homemade pasta, or pasta from the farmer’s market fridge, or even your generic dried pasta in a box.  Seriously, you will be loving every bite of the sage butter regardless! 

Sage Butter Pasta with Figs & Butternut Squash

Sage Butter Pasta with Figs & Butternut Squash

Bon Appétit!

Sage Butter Pasta with Figs & Butternut Squash
Write a review
Print
Ingredients
  1. 1 butternut squash
  2. 1 TBS EVOO
  3. Salt
  4. Pepper
  5. 1/2 tsp cinnamon
  6. 1/4 tsp freshly ground nutmeg
  7. 1 lb Pasta Your Choice (ravioli, spirals, etc.)
  8. 1 stick butter
  9. 1/4 cup sage leaves (about 4 stems)
  10. 1 handful fresh or dried figs, sliced
  11. 4 oz blue cheese crumbles
Instructions
  1. First, prepare the butternut squash. Preheat the oven to 400°F. Peel and cut the butternut squash into 1/2 inch pieces. (For a shortcut, you can also buy the squash already cut, but you may want to cut them into smaller bite-size pieces.) Toss the butternut squash with 1 TBS EVOO, 1/2 tsp cinnamon, about 1/4 tsp freshly ground nutmeg, and salt and pepper to taste. Roast in the oven for about 30 minutes, until the butternut squash is tender.
  2. While the butternut squash is roasting, prepare the pasta according to the package directions.
  3. Finally, prepare the sage butter. Melt 1 stick of butter over low heat. When the butter is melted and starting to bubble, add the sage leaves. Allow to cook until the butter turns a soft brown color.
  4. After draining the pasta, drizzle with the sage butter and top with the roasted butternut squash, figs, and blue cheese crumbles.
Listfull Days http://listfulldays.com/
Share on Facebook

Thirsty Thursday: Everyday Margarita

Posted on

I was racking my brain today coming up with my blog topic.  In the past, I’ve stuck to Throw Back Thursdays in an effort to catch up on old blog posts.  (Ha!  Like that will EVER happen!)  But, I knew that a throw back post would take a lot of time (which I do not have today), and so, I was hoping to come up with an alternative theme.  Last night, we had some leftover Mexican, and I made some margaritas to go with it.  I had them ready for when Hubby got home – tequila, citrus liqueur, and two margaritas waiting.  Of course, I took a picture.  I almost posted it to Instagram last night and was coming up with a possible hashtag when I remembered Wet Your Whistle Wednesday.  Now, that takes me back!

When Hubby and I were first married, we moved into an apartment in the ATL.  We had a few college friends who lived in the city, and we were determined to stay in touch.  So, Hubby had the bright idea to have a weekly cocktail night at our place.  We had a catchphrase for every night of the week!  But, Wet Your Whistle Wednesday was one of my favorites.  Unfortunately, or fortunately, today is not Wednesday.  It’s Thursday.  (Nice calendar lesson for you 😉 ) So, I give you Thirsty Thursday.

This is my go-to margarita recipe, if you can even call it a recipe.  Think along the lines of Sandra Lee’s Semi Homemade.  For starters, you want a decent tequila.  Please don’t buy anything in a plastic jug.  The next day will not be pretty.  We have several favorites that we alternate, but one of my favorites is 1800 Reposado.

1800

Isn’t that bottle pretty?!  So, I really don’t know much about tequila other than I like to drink it.  We first “discovered” 1800 on our trip to Mexico for my 30th birthday.  We stayed on the club level of our resort, which came with a private lounge.  One of the bartenders introduced us to 1800, and we began requesting it for all of our margaritas.  It’s delicious!  At any rate, any tequila you like will do!

Next, you want a citrus liqueur.  Really any flavor will work.  Triple Sec, Grand Marnier, etc.  Hubby has been known to make a mean Limoncello margarita.  He picked out a Patrón citrus liqueur.  Perfect!

Finally, you need the margarita essence:  limes.  Now, I wish I could tell you that I squeeze fresh limes every time I mix a new drink.  Or rather, I wish I could tell you that someone else squeezes fresh limes for me every time I want a margarita.  Where is my butler?  But, I rarely have that many limes on hand.  Plus, then I usually need some sort of simple syrup or other sweetener to tone the tartness of the limes down a notch, and it just becomes a mixology lesson when I just wanted an easy mixed drink.  You may be thinking, “Why don’t you just keep some margarita mix on hand?  They sell it already mixed!”  In a sense, I do use a mix, but it’s not fluorescent green and it doesn’t contain the name of a popular song 😉  My secret ingredient:  Limeade.  But, if you’re heading towards the frozen concentrate, let me stop you.  You want a limeade that comes in a jar.  My favorite:  Santa Cruz Organic.

Santa Cruz Organic Limeade

You can find this at just about any grocery store.  I like to stock up when it’s on sale during the summer.  My second choice is Simply Lime.  If you have a favorite limeade, feel free to use that as well!

Everyday Margarita

Ingredients

Tequila (1800 or your favorite)

Citrus Liqueur (Triple Sec, etc.)

Limeade

Lime for garnish

Ice

Instructions

Fill a lowball halfway with ice.  Pour tequila until glass is half full.  Add a splash of citrus liqueur.  Fill the rest of the glass with Limeade.  Squeeze a lime wedge and drop into glass.  Stir.  Sip.  Enjoy.  That’s it!

Everyday Margarita

Cheers!


Share on Facebook

Meatless Monday: Spinach & Artichoke Stuffed Portobellos with Roasted Spaghetti Squash

Posted on

Portobellos are one of my favorite meatless meals.  Specifically, this recipe that I’ve already shared.  We literally eat this meal several times a month.  It’s quick and easy, which makes it a good last-minute menu item.  It’s a great meal for menu-planning day or maybe I-forgot-to-plan-a-menu day.  Munchkin LOVES mushrooms, too, so I try to fix them often for him.  Last week, we had an opened jar of artichokes in the fridge that needed to be eaten.  I decided to come up with another portobello variation instead of relying on the old faithful.

Let me just tell you that I think this recipe will be added to the monthly rotation.  It was quick and easy, too, and I think it will lend itself to last-minute prep and improvisation.  (That’s another reason I love the other recipe so well – I can use up whatever cheese or veggies that are hanging out in the fridge.)  I served these on top of roasted spaghetti squash.  Delicious combo!  If you haven’t experimented with spaghetti squash, please try it!

Spinach & Artichoke Stuffed Portobellos with Roasted Spaghetti Squash

Ingredients

6 large portobellos

1/2 sweet onion, chopped

1 clove garlic, chopped

1 cup fresh spinach

6 artichoke hearts, chopped

1 TB cream cheese (or any soft cheese)

1/2 cup feta cheese

1 Spaghetti Squash

Salt & Pepper

EVOO

Instructions

Preheat oven to 350°. Cut spaghetti squash in half lengthwise.  Scoop out the seeds.  Drizzle with olive oil and sprinkle with salt and pepper.  Place flesh-side down on a baking dish and bake for an hour.  Then, scrape the flesh with a fork to pull out the spaghetti-like strands.
While the spaghetti squash is cooking, remove the stems from the mushrooms and chop.  Heat a tablespoon of EVOO over medium heat in a large skillet.  Add the onions and chopped mushroom stems.  Saute for several minutes, until the onions are translucent.  Add the garlic and cook for a couple minutes more.  Add spinach and artichokes.  Cook until spinach is wilted.  Remove from heat and stir in cream cheese, then season with salt and pepper.  Divide spinach and artichoke mixture between mushroom caps.  Sprinkle with feta cheese.  Bake for about 15 minutes.
Serve mushrooms over the spaghetti squash.
Spinach & Artichoke Stuffed Portobellos
Bon Appétit!


Share on Facebook

One Pot Wonder Wednesday: Boo’s Chili

Posted on

Wow – Can you believe I actually remembered how to log into the admin page?!  I’ve had great blog ideas popping into my head, but I just haven’t seemed to sit down to the computer.  In a while.  Let’s just call it a summer sabbatical, shall we?  Yes, let’s go with that.  But, with the start of fall last week, it’s time to get back into the swing of things at Listfull Days.  I mean, these lists don’t make themselves!  And, they certainly don’t take care of themselves!  Wouldn’t that be nice?!  So, for my first blog post back this fall, I wanted to start with the ultimate fall recipe:  Chili!

Last spring, I posted the yummy Chicken Quinoa Chili recipe.  This is a delicious recipe and has joined our normal rotation of recipes.  It’s also a great meal to take to friends who are recovering from an illness or adjusting to life with a new baby.  It makes a ton, so you’ll have plenty for dinner for yourself, too.  But, this is not the classic chili that we all think of when we think of fall and maybe football season.  (Those of you who know me know that football season means nothing more to me than delicious game-day food!)  I filled up the crock pot last Wednesday to celebrate the official start of fall.  You will definitely want to put this on the menu this weekend!

Now, this recipe originally came to me from my sister.  She happens to be the football fan of the family and has hosted many a game-day at her home.  She makes a mean pot of chili!  One of her key ingredients is chili hot beans.  When she originally sent me the recipe, she specified that they had to be Kroger brand.  I trusted her, of course, and bought the Kroger beans.  But, I didn’t know how right she was until I had to make-do one time without the Kroger brand.  How right she was!  Now, I tend to stock up when they are on sale because one can never have too many cans of chili beans just like it’s always chili season.  (I do actually make chili year-round.)  Another one of her key ingredients is Chili-O seasoning.  However, a few years ago when we experimented with g-free eating, I discovered that Chili-O, in fact, contains gluten.  Wait, what?!  Why?!  I don’t usually use pre-mixed seasonings, but this has always been my exception because it is. so. good.  But, after knowing the gluten was there, I just couldn’t bring myself to buy it anymore.  Ignorance is definitely bliss in this case.  (Don’t even tell me what is in a Starbucks Pumpkin Spice Latte because pumpkin season just began, and there is no way I’m giving that up this year!)  So, I decided to come up with my own Chili-O seasoning.  I’ll be honest:  my chili tastes a little different than my sister’s now, but I don’t even care.  It’s delicious!  I include a little bit of cayenne because we like a little heat in this house (Hubby still adds Sriracha to his bowl), but it can certainly be left out for a milder taste.  I still call it Boo’s chili, though.  It’s even listed in my Pepperplate index as Boo’s chili.  I don’t think she’ll mind a little variation.  Add some Greek yogurt, shredded cheese, and tortilla chips!  The leftovers also make great nachos!

Boo’s Chili

(Adapted from my sister’s favorite chili!)

Ingredients

1 – 28 oz can crushed tomatoes (try to find organic, low sodium if possible.  Kroger has a store brand that I usually buy.)

2 – 15 oz cans chili hot beans (Kroger! They have an organic option, now!)

2 – green bell peppers, chopped (chop to your size preference; we like chunky chili, so I chop it coarsely)

1 – sweet onion, chopped

1 lb ground beef

1 TB chili powder

1 1/2 tsp onion powder

1 1/2 tsp garlic powder

1 TB paprika

1 tsp cumin

2 1/2 tsp salt

1 tsp cayenne pepper

1 tsp ground black pepper

1/2 tsp thyme

1/2 tsp oregano

Instructions

Brown beef.  Add all ingredients to crock pot and cook all day.

Boo's Chili

Bon Appétit!


Share on Facebook

Meatless Monday: Provençal Vegetable Casserole

Posted on

We tend to be very cheap frugal in this house when it comes to entertainment, but there are a few things we willingly spend money on:  music, food, and drinks.  I mentioned a few weeks ago that we subscribed to the Food & Wine publication.  Seriously, this is the only magazine we have paid for.  It is right up our alley.  Recipes, drink recommendations, along with travel highlights thrown in.  When we receive the latest edition in the mail, we both scour it for recipes we want to try.  I’ll be honest:  ALL of the recipes look delicious, but this isn’t a spin-off of 30-minute meals.  There are many that appear too laborious or require too many exotic ingredients.  So, while we enjoy looking at the pictures, we know some of these recipes will never end up on our menu.

Several years ago, we hosted Easter dinner at our house.  We had recently received the April 2011 edition of Food & Wine, and tonight’s recipe was one of the side dishes we chose to serve.  It did not disappoint.  It is fairly easy to prepare, although it does require some time to bake.  It’s a great dish for entertaining because all of the mess is made in the prep, and then you’re left with an hour and half of bake/rest time to clean up 😉  You could also easily prep ahead of time.  (My favorite kind of entertaining recipe!)  The recipe also makes a good portion, so it’s great for a crowd or for leftovers.  There are so many things you could do with leftover roasted vegetables!  While originally I served this as a side dish, the eggplant and zucchini give the dish enough depth to serve as a meatless entrée.  I served it with some tri-color quinoa tonight.

Provençal Vegetable Casserole

(Adapted from Food & Wine)

Ingredients

3 TBS EVOO
2 large beefsteak tomatoes, sliced 1/4 inch thick
Salt and freshly ground pepper
1 large onion, thinly sliced
2 garlic cloves, minced
2 tsp oregano, chopped
One 1 1/2-pound eggplant, sliced lengthwise 1/4 inch thick
Two 1/2-pound zucchini, sliced lengthwise 1/4 inch thick
1 TBS chives, chopped

1 TBS herbes de provence

Instructions

Preheat the oven to 350°. In a large skillet, heat 1 tablespoon of the olive oil. Add half of the tomatoes, season with salt and pepper and cook over high heat for about 10 seconds per side. Transfer the tomatoes to a large plate; repeat with the remaining slices.

Add the remaining 2 tablespoons of oil to the skillet. Add the onion, garlic and oregano, cover and cook over moderate heat, stirring occasionally, until softened. Season with salt and pepper; remove from the heat.
Oil a 9-by-13-inch ceramic or glass baking dish. Arrange one-third of the eggplant on the bottom of the dish, drizzle with oil and season with salt and pepper. Scatter half of the onions on top, followed by half of the zucchini. Drizzle the zucchini with oil, season with salt and pepper and sprinkle with the oregano. Arrange half of the tomatoes and their cooking juices over the zucchini. Repeat the layering, sprinkling the second layer of zucchini with the chives, and ending with a final layer of eggplant. Drizzle with oil; season with salt, pepper, and herbes de provence.
Cover the casserole with foil and bake in the upper third of the oven for 1 hour. Remove the foil. Continue baking for 30 minutes longer, until very tender.
Preheat the broiler. Broil the casserole 4 inches from the heat until browned. Let rest for at least 15 minutes, then serve.
Provençal Vegetable Casserole
Bon Appétit!
Share on Facebook

Meatless Monday: Zucchini Grilled Cheese

Posted on

Several years ago, we received a promotional mailing from American Express.  We normally toss these straight into the trash, even before opening, but for some reason, we were intrigued by this one.  Food & Wine: Does it get any better than that?!  We love to eat, cook, and drink wine.  Sign us up!

Tonight’s recipe is one of our favorite finds from our Food & Wine subscription.  I just looked at the publication date when I looked up the recipe: 2009!  Yikes!  How has it been 6 years that we’ve been making this one on a regular basis?!  Time really does fly!  But, that should tell you just how good this one is!

One of my favorite parts of this recipe is the pesto.  You could follow the pesto recipe for anything.  (I love a good pesto in the summer!)  This sandwich really comes together quickly, which is another plus.  We often use our panini press to grill the zucchini AND grill the sandwiches, but I was out of counter space the other night and chose my trusty grill pan instead.  I bought a veggie pack from Trader Joe’s (SO GOOD – I don’t know why I don’t do it more often!) to serve on the side.  It included mushrooms, red onions, and asparagus, and I added some mini bell peppers that I needed to cook.  Just sauteed in a pan with some EVOO, and our meal was complete!

Grilled Gruyère-and-Zucchini Sandwiches with Smoky Pesto

(From Food & Wine)

Ingredients

1 packed cup basil leaves
1 large garlic clove, coarsely chopped (I just throw the garlic into my food processor first, chop, and then add in the remaining ingredients)
1/2 teaspoon hot smoked paprika
3 tablespoons extra-virgin olive oil, plus more for brushing
Salt
One 8-ounce zucchini, cut into 4 lengthwise slices
4 English muffins, preferably Bays, split (Look for a whole-wheat option!)
4 ounces Gruyère or Appenzeller cheese, cut into 8 thin slices

Instructions

In a mini food processor, combine the basil, garlic and paprika and process until finely chopped. (Put garlic clove in whole, chop, then add the basil and paprika.)  With the machine on, gradually pour in the 3 tablespoons of olive oil until blended. Season the pesto with salt.
Light a grill. Brush the zucchini slices with olive oil and season with salt. Grill over high heat until nicely charred and just tender, about 2 minutes per side. Cut each zucchini slice in half crosswise.
Grill the English muffins, cut side down, over low heat, until just soft, about 30 seconds. Turn and grill until the muffins start to brown, about 1 minute. Spread the cut sides of the muffins with the pesto. Layer 1 slice of cheese, 2 zucchini pieces and 1 more slice of cheese on the bottom halves of each muffin. Close the sandwiches and brush the tops and bottoms with olive oil. Grill the sandwiches over low heat, turning, until they’re crisp on the outside and the cheese is melted, about 4 minutes total. Cut the sandwiches in half and serve right away.

Zucchini Grilled Cheese

Bon Appétit!


Share on Facebook